Exam Technique - Last-Minute Golden Tip
The simplest, last-minute exam tip of all time
Here is the simplest Exam Technique tip ever:
Don’t fold the exam paper back on itself
Students typically fold the paper back to reduce it to A4 size, and to focus on just one page. Don’t do this!
Often, questions straddle more than one page. These will appear opposite sides of the fold. Keep the paper open, and you will be able to see all the information at once. Something from an earlier part of the question may well be vital for answering the last part. Don’t hide it from view!
More posts with exam tips:
Preparing for A level Biology: what can I do in the summer
What can you best do over the summer to help transition to A level Biology? (It's probably not what you're thinking.)
Tips and information to help with the transition from GCSE to A level.
Aiming for Success
Pressure on students seem to grow every year, with more and more students looking to do work over the summer to prepare for starting A level Biology in the autumn term. It’s true that A level Biology is a challenge, and there are certainly things you can do that will help your studies. This article gives advice on what you can best do to hit the ground running when you start your A level course.
One thing I don’t recommend is to ask a tutor to teach you A level content before you start. All this will do is interfere with your teacher’s work and make the classroom less interesting as there will be no surprises. That’s not a great way to build motivation for the long term. It’s much better to encounter new topics in the classroom, and use tutoring to check/deepen understanding and correct misconceptions.
The best things you can do over the summer are things that will (1) help consolidate your prior knowledge and understanding, and (2) create anchor points for you to learn/remember new knowledge.
You’re not going to like the first, but the second might be just what you need right now.
Consolidate Prior Knowledge
How did you do at GCSE?
A level biology builds upon concepts that you studied for GCSE. Having these solid in your mind will help massively when you are introduced to new materials. If you know you are a bit wobbly on some topics, watch out because that will make it difficult for you to understand the A level material - you’ll effectively need to learn both levels of content at the same time. And that’s a real challenge. Mastering the GCSE material will mean you can use it with little mental effort while grappling with the more-complex A level concepts.
Ok so it might feel weird to back go over GCSE content when the exams are done and dusted, but you’re going to need all that stuff again in your A level course. Maybe go back through it in August in the run-up to starting your A-level studies, and drill down into any areas where you feel like you’ve just memorised it without any real understanding.
Look at this comparison of the spec for GCSE and A level Cell Structure:
AQA A level Cell Structure
The structure of eukaryotic cells, restricted to the structure and function of:
cell-surface membrane
nucleus (containing chromosomes, consisting of protein-bound, linear DNA, and one or more nucleoli)
mitochondria
chloroplasts (in plants and algae)
Golgi apparatus and Golgi vesicles
lysosomes (a membrane-bound organelle that releases hydrolytic enzymes)
ribosomes
rough endoplasmic reticulum and smooth endoplasmic reticulum
cell wall (in plants, algae and fungi)
cell vacuole (in plants).
In complex multicellular organisms, eukaryotic cells become specialised for specific functions. Specialised cells are organised into tissues, tissues into organs and organs into systems.
Students should be able to apply their knowledge of these features in explaining adaptations of eukaryotic cells.
AQA GCSE Cell Structure
Students should be able to explain how the main sub-cellular structures, including the nucleus, cell membranes, mitochondria, chloroplasts in plant cells and plasmids in bacterial cells are related to their functions.
Most animal cells have the following parts:
a nucleus
cytoplasm
a cell membrane
mitochondria
ribosomes.
In addition to the parts found in animal cells, plant cells often have:
chloroplasts
a permanent vacuole filled with cell sap.
Plant and algal cells also have a cell wall made of cellulose, which strengthens the cell.
Recognise, draw and interpret images of cells.
Students should be able to use estimations and explain what they should be used to judge the relative size or area of sub-cellular structures.
You can see that there is a lot of overlap - the GCSE content is used as a foundation for learning more. Because you already know something about organelles and their general functions, you can build additional understanding by adding to this prior knowledge. Learning everything from scratch would be really hard! That’s why you need GCSE qualifications to enter the course - your GCSE knowledge will act as a springboard. But how good that springboard is might vary across topics.
You’ll also need to know how to calculate areas and volumes, and to read graphs and understand how averages can be used to understand data. How did you do at GCSE maths?
A person with strong GCSE Biology and Maths will find it much easier to learn A level Biology than someone with a poor grade in combined science. Not because they’re cleverer (whatever that means), but simply because they’re starting from a better place.
What to do: if you know you’re weak on some parts of GCSE, take a look back over those areas and make sure you have a strong foundation for learning more. You’re going to have it re-learn it at some point, and it’s easier to do it while you’re not also grappling with higher-level concepts that won’t make sense without that prior knowledge.
Stretch your Literacy
A level Biology involves a lot of complex vocabulary and comprehension of texts. Written language is very different from spoken language, so if you usually consume informal, spoken media it may be more difficult for you to follow biology texts.
Reading any long-form, professionally written texts will help stretch your literacy and get you used to the vocabulary and sentence structures used in formal writing. It would be ideal to read a pop-sci biology book on a subject that interests you, but reading any books with formal-stye writing, on just about any topic, would be a great boost.
Literacy is a huge factor in student success, and especially anyone with lower grades in GCSE English would benefit from getting more used to reading long-form written-language texts. If you’re struggling to understand the language before you even start to grapple with the biological concepts, the course will be extra-difficult for you.
What to do: find a well-written blog, or book, or other long-form media that interest you and get used to reading in an engaged, thoughtful way. Put your phone aside and practice focusing on the text and its meaning, thinking about how it links to your own interests and life.
Enrich your mind
The human brain is unable to remember facts in isolation. This is why memory experts need to use mnemonic tricks. It’s much, MUCH easier to remember things if they relate to things we already value, our life experiences, our self-image, our emotions, or our prior knowledge.
This makes A level Biology more difficult for students who been unable to travel, or have perhaps focused purely on classroom study. In biology you will encounter many examples of animals and environments that are well-known to some students, but new to others.
A student who has visited a rainforest will find it easier to learn and remember new information about rainforests not only because they might already know some things, but also because they can link new information to their prior experience.
Students with little experience may also get tripped up by organisms that are used as ‘well known’ examples to illustrate points. Some students don’t know what cows eat, or that dolphins are not fish, or that bats are mammals. Well-meaning teachers can confuse students with less-broad life experience by assuming knowledge that just isn’t there.
I’m not suggesting you don’t know what cows eat, or that you visit a rainforest (although do if you can - they’re awesome). But you absolutely can enrich your mind with different experiences and stories and images that will serve you well as anchors for future learning.
Visit different environments
If you can visit a zoo, or an aquarium - perfect! Take your time to really observe the animals. Build strong memories by taking notice of the smells and sounds around you. Read the labels. Talk to your friends about what you see, relating your observations to other things you already know about. Then, later in the course, when your teacher talks about the neck-bones in a giraffe, you can stick that information on to your memory of the giraffe in the zoo. It sounds silly but seriously, it’s like a cheat code for learning.
Maybe you can find a volunteer opportunity in the summer helping with conservation work. This can give you a real connection to the environment you’re working in, and an understanding of what it’s like to work in the field that will help you better imagine, and remember, the field studies described in your course.
Or, just visit the park. Go for a walk by a river. Notice the small organisms around you. The weeds in the cracks. Stop to observe insects. What can you smell? Notice how different animals are hanging out in different environments. In what ways do these environments vary? Stick your hand in a river, feel the texture of the leaves of a tree and notice how the top and bottom surfaces are different. Listen to the wind and birdsong, talk, build emotional and sensory memories that will provide strong anchors for future learning. Touch grass.
What to do: visit different environments, exploring with all your senses while observing and discussing the organisms you discover.
Go on a virtual adventure
Documentaries and films can take you to a vast variety of environments that you wouldn’t be able to visit in person.
Check out BBC Nature documentaries and fall into the emotional stories they tell of individual animals. Imagine how the animal feels, its challenges, abilities and basic drives. Get a really broad view of the diversity of environments and organisms on Earth and the delicate interactions. When you later learn about some A level concept, you will suddenly think “oh, wait, it’s like that thing I saw!” and suddenly it’ll all make sense and be easy to remember.
If you don’t live in the UK, especially if your local environment is very different, how about watching some programmes about, or set in, British farmland. Find out what cows eat! Examples from farming and agriculture are found throughout the course and will be less accessible to you if they are unfamiliar.
What to do: immerse yourself in rich visuals, music and stories of environment and organisations from around the planet.
The best part about building these rich memories is that it won’t burn you out. You can enjoy the experience without having to do difficult analytic thinking, trying to force information into your brain, or recalling complex information.
Let’s face it, if you’ve just finished your exams then more academic study might not be what you need right now.
So in summary …
Broaden your mind and lay the foundational knowledge that you will need to engage with A level Biology concepts. In this way you can set yourself up for an easier time in the classroom in September - and throughout the whole course.
Article by Jenny Shipway. If you liked it, click ❤️Like below to help others find useful articles.
Key Concept: Averages, Range, and Standard Deviation, with A level Biology Past-Paper Questions
You need to know some maths for A level Biology. This includes knowing how to interpret averages (mean, median and mode), ranges, and standard deviations to work out whether an experiment can be said to have shown an effect or not. Master this early on and it will not help you with exam questions, but also make it easier for you to learn the bits of the course that are explained using these statistical methods.
Why does Biology need so much data?
Maybe the guy at the back is just big for his age?
Researchers often want to compare two or more things. Which species of frog is heavier? Which type of soil grows taller plants? At what temperature do these bacteria divide fastest? At which pH are fish most active?
The biological world is complicated, so multiple, repeated measurements are usually required.
There are three main reasons for taking multiple measurements:
Measurement errors. It’s hard to take measurements in the real world. Even if you re-measure the exact same thing, and even if you use a well-calibrated tool, you might get a slightly different result each time. Maybe you can’t hold the tool still enough, or you can’t read it clearly, or the thing you’re measuring moves. These are precision errors.
Individual variation. If you want to ask a general question about a whole population, eg “do robins sing more than blackbirds” then you need to measure data from more than two individuals. If you only use two, you might randomly pick outliers; maybe you get a particularly perky robin, or a lazy/sick blackbird. Similarly, if you sample a small area of a larger region, you may not pick a representative area.
Uncontrolled variables.There will nearly always be variable-influencing factors that you’re not aware of, or unable to control. Maybe there are changing sounds or smells in the environment, subtle changes in light, or in the birds’ blood-sugar levels. These can affect individual measurements in unpredictable ways.
All of these things can affect the value you record, making any one single measurement unreliable. So researchers normally end up collecting large sets of measurements. In this way they can get a much better idea of what’s really going on.
Why does Biology need Statistical techniques?
Plotting lots of repeated measurements for different datasets on the same graph can create a confusing mess. Also, “the data look different to me” isn’t good enough for science.
Reducing each dataset to just two or three values makes it much easier to compare. In fact, it’s so simple that such data can be understood even without a graph, so values are often presented very simply in a table.
Calculating Averages in Biology
There are three types of average: mean, median, and mode. They all reduce the data set to one single number.
This is useful for comparisons. For example, if you let a frog jump ten times, measuring the length of every jump, you can calculate their average jump length. You can then compare that single number to the average jump length from another frog to find out which jumps further.
Calculating the Mean
The most important type of average for A level Biology is the mean. It’s also what most people are talking about when they say “average” in everyday life.
To find the mean, add up all the numbers, then divide by how many numbers there were. You end up with just one number.
Here’s an example dataset:
| Set 1 |   | 3 | 4 | 5 | 5 | 5 | 6 | 6 | 6 | 7 | 8 |   | total = 55   /   n = 10   /   mean = 5.5 |
| Set 1 |   | 3 | 4 | 5 | 5 | 5 | 6 | 6 | 6 | 7 | 48 |   | total = 95   /   n = 10   /   mean = 9.5 |
| Set 1 |   | 3 | 4 | 5 | 5 | 5 | 6 | 6 | 6 | 7 | 48 |   | central number(s) = 5 and 6   /   median = 5.5 |
| Set 1 |   | 1 | 3 | 5 | 5 | 5 | 5 | 6 | 6 | 7 | 48 |   | mode = 5 |
| Set 1 |   | 50 | 50 | 50 | 50 | 50 | 50 | 50 | 50 | 50 | 50 |   | mean = 50   /   median = 50   /   mode = 50 |
| Set 2 |   | 25 | 30 | 35 | 40 | 50 | 50 | 60 | 65 | 70 | 75 |   | mean = 50   /   median = 50   /   mode = 50 |
| Set 3 |   | 1 | 2 | 3 | 4 | 50 | 50 | 96 | 97 | 98 | 99 |   | mean = 50   /   median = 50   /   mode = 50 |
The averages are the same! By themselves, averages only tell you one small part of the story.
What is Range / why is it useful
One of the big differences betwen the datasets above is the range of numbers that appear.
The range is the range-of-values that appear, from the lowest to the highest.
| Set 1 |   | 50 | 50 | 50 | 50 | 50 | 50 | 50 | 50 | 50 | 50 |   | lowest value = 50   /   highest value = 50   /   range = 50 to 50 |
| Set 2 |   | 25 | 30 | 35 | 40 | 45 | 55 | 60 | 65 | 70 | 75 |   | lowest value = 25   /   highest value = 75   /   range = 25 to 75 |
| Set 3 |   | 1 | 2 | 3 | 4 | 50 | 50 | 96 | 97 | 98 | 99 |   | lowest value = 1   /   highest value = 99   /   range = 1 to 99 |
Set 1 has a range of 50 to 50. So you can reasonably predict that the next measurement would likely be 50 too
Set 2 and Set 3 have wider ranges. There are a wider range of possible values that might be measured, so it’s harder to predict what the next measurement might be.
A wide range might indicate that your measurement technique is very unprecise, or that there is a wide natural variation in the thing you are measuring, or that there is another factor affecting your measurements.
But a wide range might also just mean there were one and two weird outliers in the data. So you need to be careful when using this value. Here is a set with one odd measurement, which might be due to a measurement error.
| Set 4 |   | 50 | 50 | 50 | 50 | 50 | 50 | 50 | 50 | 50 | 90 |   | lowest value = 50   /   highest value = 90   /   range = 50 to 90 |
| Set 1 |   | 25 | 42 | 48 | 50 | 50 | 50 | 50 | 52 | 58 | 75 |   | values clustered around mean = low standard deviation |
| Set 2 |   | 25 | 30 | 35 | 40 | 45 | 55 | 60 | 65 | 70 | 75 |   | values spread out away from mean = high standard deviation |
To understand Standard Deviation, think about a situation where you have made very many measurements, so that you have multiple measurements at each possible value. Now plot these on a graph (see below). In biology, you usually see that the graph forms a bell shape. This is called a “Normal distribution”.
Normal distributions are symmetrical, so the mean, mode, and median are all the same, appearing at the centre of the graph (mean, median, and mode = 16 in this example). In normal distributions, most measurements are near the average, so there is a peak in the middle of the graph.
(Sometimes, you’ll find a curve is skewed a bit to one side. This separates out the mode, median and mean values. But for our purposes, I’m going to stick to thinking about the symmetrical graph.)
How wide the curve is matters a lot, because it affects how much two sets of data overlap. Compare these two examples below. Both have one set of data where the mean is 14 (plotted in orange), and another set where the mean is 20 (plotted in blue).
There is the same amount of data in both graphs, and the averages haven’t changed. But there is a lot less overlap between the two datasets in the example to the left. The data on the right is a lot more spread out away from the average values.
When datasets overlap a lot, you need to be very careful that you definitely have enough data to be sure their means really are different. If you have a small data set with a lot of variation, then adding extra measurements can make a big difference to the mean.
What is Standard Deviation
Standard Deviation tells you how widely the data is spread out in a normal distribution. Its symbol is sigma, “σ”.
You’re very unlikely to be asked to calculate standard deviation in an exam, and it takes a while to explain so I’m not going to go through it here (don’t worry they’d give you the equation if you did have to do this).
But you do need to know what it tells you.
Here is the basic normal distribution graph again. The graph is symmetrical and the mean (μ) is in the centre.
Now here is the same graph, but two more values are marked on the x-axis, shown by orange lines. These are the value of the mean minus one standard deviation (μ-σ), and the value of the mean plus one standard deviation (μ+σ).
If you colour in the bit of the graph that is within one standard deviation of the mean (from μ-σ to μ+σ), then on any normal distribution, 68.27% of the data points will lie within this area. You don’t need to remember that percentage, but remember it is always the same.
This means that if the standard deviation is a small number, you know most of the data points are close to the mean. This gives you more confidence that the mean is a useful value for comparison.
The graphs below have the same X-axis. Both are normal distributions with the same mean. But the one on the left has a small standard deviation, and the one on the right has a high standard deviation. (Some of the data from the right-hand graph falls outside the values shown on the graph.)
How to tell if there is a significant difference between values using the mean and standard deviation
!! Ok so this is the important bit we’ve been building up to !!
In a normal distribution, most of the data (68.27%) falls within one standard deviation of the mean. This is the area between μ-σ and μ+σ.
To work out whether it’s just chance that the means are different, or whether it’s a real effect, you need to check whether this area overlaps bewteen the two sets of data.
If the areas between μ-σ and μ+σ overlap, the difference is not considered significant.
There are different ways of presenting the data.
Standard Deviations Using Numbers - example
An example:
Set 1: mean (μ) = 50, standard deviation (σ) = 8
Set 2: mean (μ) = 40, standard deviation (σ) = 3
Are these sets of data significantly different? Look at the areas between μ-σ and μ+σ
Set 1: μ-σ = 42 and μ+σ = 58
Set 2: μ-σ = 37 and μ+σ = 43
Do these areas overlap? Yes they do (both include 42-43). So you can not consider the two data sets significantly different.
(Also worth knowing: nearly all the data (95.45%) falls within two standard deviations (between μ-2σ and μ+2σ) - so if these two areas don’t overlap you can be even more sure the two sets of data really are different.)
Standard Deviations Plotted on Graphs - example
On graphs, the mean is plotted as usual, with a dot or column. Extra lines extend out to show the area from μ-σ to μ+σ. This can make it more obvious whether areas overlap or not (unless they are super close in which case numbers are more useful).
Standard Deviation Exam Past Papers
Example Exam Question 5
Question 5 answers found at the bottom of this web page
Understanding Standard Deviations from Graphs
Example Exam Question 6
Question 6 answers found at the bottom of this web page
Example Exam Question 7
Question 7 answers found at the bottom of this web page
Graphs and Tables in A level Biology
If you’re not confident with questions that include graphs and tables, see the recent blog post “How to Approach A level Biology Graph and Table Questions: Tips and Exam Question Pack”, which offers more useful tips for navigating them during exams, and more exam questions to practice with.
Answers to example exam questions
The data for the damaged block should be ignored. The mean for shape C is 3520 seconds
Cinnamon Oil median = 16, mean = 17 ….. and ….. Postive Control median = 12, median = 13
Median = 41. This avoids the outliers affecting the value as would happen if you used the mean. And the sample size is too small to use the mode (there are no repeated values)
The range is 2 to 11
Bull terrier genetic diversity is significantly the smallest of the breeds shown, meaning it the most inbred. Jack Russell genetic diversity is significantly the greatest. The genetic diversity of Miniature terrier and Airedale terriers are similar with no significant difference between the two.
Standard deviation is spread of data around the mean; using standard deviation reduces effect of anomalies/ outliers; standard deviationcan be used to determine if (the difference in results is) significant/not significant/due to chance /not due to chance
Trapping increases enzyme/GOx/HRP activity; the difference/increase is significant (it is unlikely to be due to chance as the standard deviations do not overlap)
Photosynthesis - OCR A MCQs Self Marking Quiz
Self-marking multiple choice quiz for Photosynthesis. Using OCR A past paper exam questions.
Amino acids and Proteins - OCR A Self Marking Quiz
Self-marking multiple choice quiz for Proteins. Using OCR A past paper exam questions.
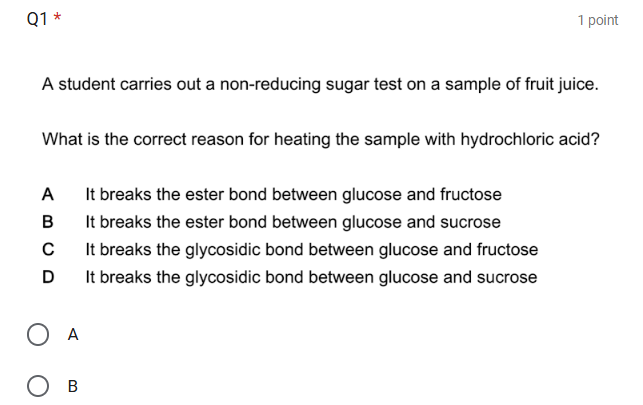
Quizzes are really important for retention !
Food Tests and Chromatography- OCR A Multiple Choice Questions - Self marking Quiz
Self-marking multiple choice quiz for Food Tests and Chromatography. Using OCR A past paper exam questions.
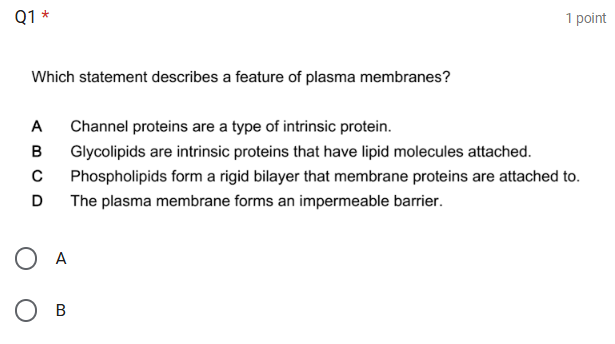
Quizzing is really helpful for retention of knowledge
Phospholipids, Lipids and Cholesterol - OCR A Multiple Choice Questions - Self marking Quiz
Self-marking multiple choice quiz for Phospholipids, Lipids, and Cholesterol. Using OCR A past paper exam questions.
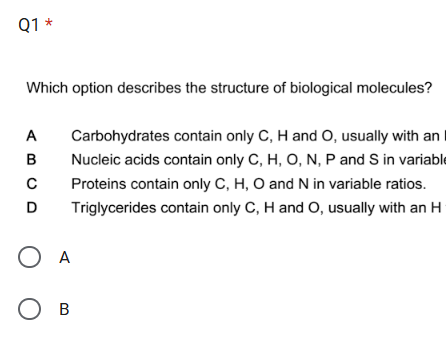
Quizzing is really helpful for retention of knowledge
Carbohydrates, Ions and Elements - OCR A Multiple Choice Questions
Self-marking multiple choice quiz for Carbohydrates, Ions and Elements. Using OCR A past paper exam questions.

Booking now: OCR A Y13, Tuesdays 6:30pm from September 2026 to June 2027
Weekly Group Masterclasses for OCR A Y13
Raise your exam grade with question focused masterclasses from a highly experienced A level Biology teacher.
Every week we go through a different topic from the specification and look at how to apply the content to OCR A exam questions. I show how to understand commonly occurring questions and how to answer them.
Weekly Group Masterclasses for OCR A Y13
Raise your exam grade with question focused masterclasses from a highly experienced A level Biology teacher.
Every week we go through a different topic from the specification and look at how to apply the content to OCR A exam questions. I show how to understand commonly occurring questions and how to answer them.
“Outstanding A-level Biology tutoring! Patient, engaging, and highly personalised—even in group classes, it feels one-to-one. Recorded sessions, all questions answered, and every student involved. Our daughter jumped a grade and achieved an A and a place to study Medicine at University” - Google reviews 2025
During the lesson students use an interactive whiteboard to write answers to exam questions which (only) I can see and comment on. Students can ask questions at any time but are not required to speak on camera to the group. The classes run in focus mode on zoom - so I can see every student, but they are not visible to the rest of the class.
Students can stream a recording after their lesson for revision and note taking.
I teach using evidence-based educational theory. With decades of A level Biology class and one-to-one teaching experience, I am very aware of the misconceptions and misunderstandings that cause students to unnecessarily struggle, and of the mistakes that can lead to dropped marks in exams.
By correcting these issues, students not only do better in exams but also learn to enjoy studying Biology.
The typical class size is 6-12 students. No payment is taken in advance. The classes are £45 per lesson. The card you use to reserve your place is charged after the lesson.
OCR Biology A Y13 Schedule (2026–2027) Time: Tuesdays at 6:30 PM Notes: Closed for Christmas (Dec 22 & 29); Includes sessions during Easter.
| Month | Date | Spec Ref | Topic Focus |
|---|---|---|---|
| September 2026 | 15 Sep | 5.2.1 (a–d) | Photosynthesis – chloroplasts, pigments, light-dependent stage |
| 22 Sep | 5.2.1 (e–h) | Photosynthesis – Calvin cycle and limiting factors | |
| 29 Sep | 5.1.1 (a–d) | Communication and Homeostasis | |
| October 2026 | 06 Oct | 5.2.2 (d–g) | Respiration – Part 1 (Krebs cycle, oxidative phosphorylation) |
| 13 Oct | 5.2.2 (a–c) | Respiration – Part 2 (Glycolysis, anaerobic, RQ) | |
| 20 Oct | 5.1.4 (a–c) | Hormonal Communication – Part 1 | |
| 27 Oct | 5.1.4 (d–e) | Hormonal Communication – Part 2 | |
| November 2026 | 03 Nov | 5.1.2 (a–b) | Excretion and the liver (incl. diabetes) |
| 10 Nov | 5.1.2 (c–d) | Kidneys – Part 1 (Structure and nephron function) | |
| 17 Nov | 5.1.2 (d–f) | Kidneys – Part 2 (Osmoregulation and dialysis) | |
| 24 Nov | 5.1.3 (a–d) | Nerves – Part 1 (Resting and action potentials) | |
| December 2026 | 01 Dec | 5.1.3 (e–g) | Nerves – Part 2 (Synapses and transmission) |
| 08 Dec | 5.1.5 (a–c) | Animal responses (Brain, reflexes, heart rate control) | |
| 15 Dec | 5.1.5 (d) | Meiosis recap, monohybrid, codominance, sex linkage | |
| 22 Dec | — | No Lesson (Christmas) | |
| 29 Dec | — | No Lesson (Christmas) | |
| January 2027 | 05 Jan | 5.1.5 (e–f) | Inheritance: Dihybrid, autosomal linkage, epistasis |
| 12 Jan | 6.1.2 (c–d) | Chi-squared and t-test | |
| 19 Jan | 6.3.1 (a–d) | Succession, distribution, and abundance | |
| 26 Jan | 5.1.5 (l) | Muscle contraction | |
| February 2027 | 02 Feb | 6.1.1 (a–c) | Cellular Control – mutations and gene regulation |
| 09 Feb | Revision | Revision lesson on the whole of Module 5 | |
| 16 Feb | 6.1.3 (a–b) | Manipulating Genomes – DNA & gene sequencing | |
| 23 Feb | 6.1.3 (c–e) | DNA profiling, PCR, and gene analysis | |
| March 2027 | 02 Mar | 6.1.2 (e–f) | Evolution and Hardy-Weinberg |
| 09 Mar | 6.1.2 (g–h) | Speciation and artificial selection | |
| 16 Mar | 6.1.3 (f–g) | Gene therapy and cloning | |
| 23 Mar | 6.1.3 (h) | Genetic engineering | |
| 30 Mar | 5.1.5 (g–j) | Plant responses – Part 1 (Easter Session) | |
| April 2027 | 06 Apr | 6.3.2 (a–b) | Populations and sustainability (Easter Session) |
| 13 Apr | 6.3.2 (c–e) | Conservation, preservation, and management | |
| 20 Apr | 6.3.1 (e) | The nitrogen cycle | |
| 27 Apr | 6.3.3 (a–b) | Biotechnology – microorganisms | |
| May 2027 | 04 May | 5.1.5 (k) | Plant responses – Part 2 |
| 11 May | 6.3.1 (f–h) | Ecosystems and biomass transfer | |
| 18 May | Revision | Revision lesson - Plant transport | |
| 25 May | Final | Synoptic Links and Exam Paper Practice |
Cell Ultrastructure, Prokaryotes, Cytoskeleton Questions OCR A
Self-marking multiple choice quiz for Cell Ultrastructure, Ions, and Elements. Using OCR A past paper exam questions.
Booking now: OCR A Y12 A level Biology Weds 5.15pm from Sept 2026 to June 2027
Weekly Group classes - for OCR A Y12
Raise your exam grade with question focused masterclasses from a highly experienced A level Biology teacher.
Every week we go through a different topic from the specification and look at how to apply the content to exam questions. I show how to understand commonly occurring questions and how to answer them.
Weekly Group classes - for OCR A Y12
Raise your exam grade with question focused masterclasses from a highly experienced A level Biology teacher.
Every week we go through a different topic from the specification and look at how to apply the content to exam questions. I show how to understand commonly occurring questions and how to answer them.
“Outstanding A-level Biology tutoring! Patient, engaging, and highly personalised—even in group classes, it feels one-to-one. Recorded sessions, all questions answered, and every student involved. Our daughter jumped a grade and achieved an A and a place to study Medicine at University” - Google reviews 2025
During the lesson students use an interactive whiteboard to write answers to exam questions which (only) I can see and comment on. Students can ask questions at any time but are not required to speak on camera to the group.
The classes run in focus mode on zoom - so I can see every student, but they are not visible to the rest of the class.
Students can stream a recording of every lesson for revision and note taking.
I teach using evidence-based educational theory. With decades of A level Biology class and one-to-one teaching experience, I am very aware of the misconceptions and misunderstandings that cause students to unnecessarily struggle, and of the mistakes that can lead to dropped marks in exams.
By correcting these issues, students not only do better in exams but also learn to enjoy studying Biology.
The typical class size is 6-12 students. No payment is taken in advance. The classes are £45 per lesson. The card you use to reserve your place is charged after the lesson.
OCR Biology A Y12 Schedule (2026–2027) Time: Wednesdays at 5:15 PM Notes: Closed for Christmas (Dec 23 & 30); Includes sessions during Easter.
| Month | Date | Spec Ref | Topic Focus |
|---|---|---|---|
| September 2026 | 23 Sep | 2.1.1 | Cell structure |
| 30 Sep | 2.1.2 (f) | Water and inorganic ions | |
| October 2026 | 07 Oct | 2.1.2 (a–e) | Microscopy, magnification, and resolution |
| 14 Oct | 2.1.2 (g) | Carbohydrates | |
| 21 Oct | 2.1.2 (h) | Lipids and phospholipids | |
| 28 Oct | 2.1.2 (i) | Proteins | |
| November 2026 | 04 Nov | 2.1.2 (j) | Food tests, colorimetry, calibration, chromatography |
| 11 Nov | 2.1.4 (a–d) | Enzymes and reaction rates | |
| 18 Nov | 2.1.5 (a–b) | Plasma membranes and transport | |
| 25 Nov | 2.1.5 (c), 2.1.4 | Osmosis, enzyme inhibitors, and cofactors | |
| December 2026 | 02 Dec | 2.1.3 (a–c) | Nucleotides and DNA replication |
| 09 Dec | 2.1.3 (d–f) | Protein synthesis | |
| 16 Dec | 2.1.6 (a–e) | Cell cycle and mitosis | |
| 23 Dec | — | No Lesson (Christmas) | |
| 30 Dec | — | No Lesson (Christmas) | |
| January 2027 | 06 Jan | 2.1.6 (f) | Meiosis |
| 13 Jan | 2.1.6 (g) | Cell specialisation and differentiation | |
| 20 Jan | 2.1.6 (h–i) | Stem cells and therapeutic uses | |
| 27 Jan | 3.1.1 (a–b) | Transport in animals – Blood vessels and tissue fluid | |
| February 2027 | 03 Feb | 3.1.1 (c) | The cardiac cycle |
| 10 Feb | Revision | Revision lesson on whole of Module 2 (Practical Qs) | |
| 17 Feb | 3.1.1 (d) | Electrical activity of the heart and ECGs | |
| 24 Feb | 3.1.1 (e) | Carriage of oxygen and carbon dioxide | |
| March 2027 | 03 Mar | 3.1.1 (f) | Foetal/Maternal Haemoglobin and the Bohr shift |
| 10 Mar | 3.1.2 (a–b) | Gas exchange in humans | |
| 17 Mar | 3.1.2 (c) | Gas exchange in plants, insects, fish, and spirometers | |
| 24 Mar | 4.1.1 (a–c) | Communicable diseases – Types and transmission | |
| 31 Mar | 4.1.1 (d–e) | Barriers to infection, inflammation, and phagocytes | |
| April 2027 | 07 Apr | 4.1.1 (f–g) | Specific immune response and antibodies (Easter) |
| 14 Apr | 4.1.1 (h–i) | Immune cell activation and clonal selection (Easter) | |
| 21 Apr | 4.1.1 (j–l) | Immunity, autoimmunity, and vaccination | |
| 28 Apr | 3.1.3 (a–b) | Transport in plants – Xylem and transpiration | |
| May 2027 | 05 May | 3.1.3 (c–e) | Potometers, phloem, xerophytes, and hydrophytes |
| 12 May | 4.2.1 (a–b) | Biodiversity – Levels and sampling | |
| 19 May | 4.2.1 (c–e) | Species richness, Simpson’s Index, genetic diversity | |
| 26 May | 4.2.1 (f–h) | Human impact, agriculture, and conservation | |
| June 2027 | 02 Jun | 4.2.2 (a–c) | Classification and taxonomy |
| 09 Jun | 4.2.2 (d–f) | Evolution and natural selection | |
| 16 Jun | 4.2.2 (h–i) | Adaptations and mechanisms of evolution | |
| 23 Jun | Review | Year 12 Synoptic Review and Practical Skills |
Monoclonal Antibodies in the Immune Response (AQA/OCR, ELISA for AQA)
Monoclonal antibodies are a relatively new treatment type, with huge importance for treating migraine, cancer, autoimmune diseases, and many other conditions.
So how do they work?
What is an Antibody? What is an Antigen?
A guest blog from Dr Jenny Shipway, who studied biochemistry at university and now works in science communication and education training.
Every month, I stab myself in the thigh with an injection pen. It can be painful, but it’s well worthwhile - the pens inject monoclonal antibodies that travel freely in my bloodstream until they reach my head. There, they bind a protein that would otherwise give me migraines. This is the first type of treatment ever designed specifically for migraines. And it’s really, really effective.
Monoclonal antibodies are a relatively new treatment type, with huge importance for treating migraine, cancer, autoimmune diseases, and many other conditions.
So how do they work?
What is an Antibody? What is an Antigen?
Before you can understand what monoclonal antibodies are, you need a good understanding of antibodies in general. I won’t go through everything here so read this article if you’re not already confident.
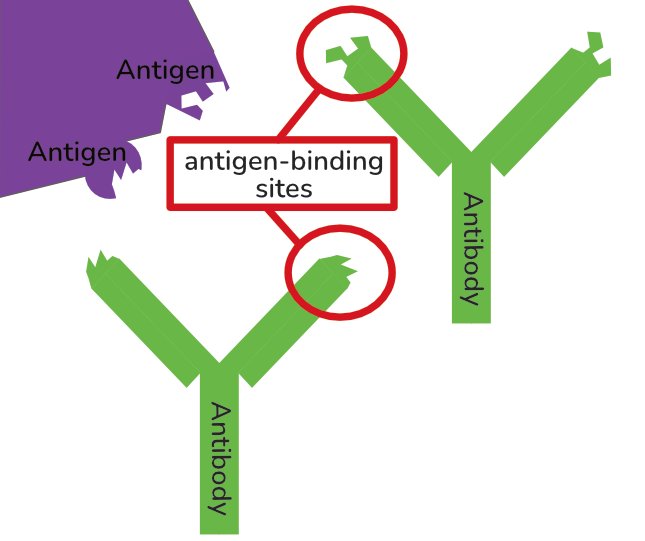
To summarise as a recap: antibodies are small protein molecules with variable antigen-binding sites. They bind molecules that don’t belong in the body to flag these up to the immune system. Eg they might bind to a viral surface protein, or a bacterial polysaccharide. The thing that they bind is called an “antigen”.
Monoclonal Antibodies
Mono = one (e.g. monomer, monosaccharide, monoxide)
Clone = an identical copy of a cell/organism with the same DNA, created from one original cell/organism (e.g. clonal selection; clonal expansion; Attack of the Clones)
Antibody = a protein molecule that binds antigens, mediating an immune response
Monoclonal antibodies are identical antibodies, made by B-lymphocytes cloned from one single starter cell.
Why inject Monoclonal Antibodies
Normally, antibodies are synthesised and released in the body by B-lymphocytes. But this requires two things: firstly that the immune system is aware of a threat, and secondly that there is a T-lymphocyte with DNA that encodes the required antibody.
The T-lymphocyte is necessary as it’s involved in sparking off B-lymphocyte replication and antibody production. But also the T-lymphocyte provides a check that it’s safe to use the antibody.
In my case, my body isn’t aware that it would be helpful to make antibodies to that pesky migraine-provoking protein. And I almost certainly don’t have any T-lymphocytes that would give the OK to produce such an antibody. At least, I shouldn’t do. Any such T-lymphocytes should have been destroyed early in my life, along with all other T-lymphocytes that were capable of producing antibodies against my own body. So I need to get the antibodies from somewhere else.
Designer Antigen-Binding Sites
In the lab, you can make any antibody you want. You just need the right B-lymphocyte.
There are a few different ways to tinker with the genetic code of a B-lymphocyte to achieve this. You don’t need to know the details. But what you do need to understand is that inside the B-Lymphoctyle, the scientist needs to ensure that the section of its DNA that codes for the antibody’s antigen-binding site has a sequence that …
… will be translated during protein synthesis into a chain of amino acids which ….
… contains a particular sequence of amino acids (primary structure) so that …
… the chain folds its backbone (secondary structure) in a way that allows …
… the whole thing to fold up upon itself (tertiary structure) so that it …
… presents a binding site with a specific shape and chemical properties that …
… will bind the antigen that they want it to bind.
This one cell can then be cloned. This produces many many identical, cloned cells with that exact same DNA, capable of producing identical antibodies with identical binding sites. Remember mono = one. This is where the “monoclonal” comes from.
Make big vats of these monoclonal cells and you can get them to pump out huge numbers of your chosen antibody to be collected and purified to use as you wish. These are monoclonal antibodies. Each antibody molecule is identical because the cells are all identical clones with the same DNA sequence.
The monoclonal antibodies in my injection pens were made like this in a lab. They have an antigen-binding site that is able to bind a protein called CGRP. By doing so, they prevent the CGRP from binding to its natural receptor, including in a particular set of neurons in my head. Which prevents my migraines.
But monoclonal antibodies can do a lot more than this - they are highly versitile due to their small size and specific binding …
Weaponising Antibodies as Therapeutics
Why stop just with changing the binding site?
Monoclonal antibodies specifically bind to your target, encumbering it and provoking a natural immune response. But why not go further? Why not get the antibody to deliver a powerful weapon directly to its target?
A big problem with injected/ingested drugs is that they get everywhere. If you inject a chemotherapy drug, it travels through the bloodstream without any map or guidance system. It reaches every part of the body. Cancer drugs usually target fast-dividing cells, but this means that as well as damaging the cancer, they get into your hair follicles where they kill healthy cells so that your hair falls out. They get into cells in your gut and kills them, making you feel sick and suffer gastrointestinal problems.
But what if you attached the drug to a monoclonal antibody that only binds the target cancer cells? It will still travel around the body in the blood, but will stop at the cancer and have much greater impact there.
Monoclonal antibodies are used in cancer therapies not only to provoke a normal immune response, but also to deliver cancer drugs, or stick cell-killing radioactive substances onto individual cancer cells. Being able to target the cancer in this way reduces unpleasant side-effects and so broadens the range of drugs that can be used.
Monoclonal Antibodies in Diagnostics
Monoclonal antibodies are useful tools outside the body too.
Until the 1950’s or so, pregnancy tests were carried out using live frogs. They would inject the woman’s urine, and if she was pregnant then her hormones would cause the frog to produce eggs just over a week later. Happily for frogs, we do things a bit differently now. (You don’t need to know about the frogs, although you may now never forget that mental image. You’re welcome.)
The modern pee-on-a-stick pregnancy test is a Lateral Flow Device. They work in very much the same way as Covid tests. You add body fluids, which soak their way along an absorbant strip, and if a certain molecule is present (eg a particular pregnancy hormone, or viral coat proteins) then a visible line appears. How do they detect the molecule of interest? By using monoclonal antibodies that will specifically bind to it. Similar tests can also be used to detect prostate cancer or HIV.
ELISA tests (for AQA)
ELISA tests work in a similar way, biochemically speaking. There are different versions but here’s the one it’s most important to know about. ELISA tests can be confusing because different types of antibodies play different roles in the process.
Direct ELISA test - a test to detect antibodies in the blood
If you are infected with a pathogen, your body will react by producing antibodies that are able to bind antigens associated with that pathogen. By detecting these antibodies, you can be diagnonised as being infected.
Here is how the test works, step by step:
1. An antigen from the pathogen (eg a viral coat protein) is covalently bonded to the well surface.
2. Blood plasma is put into the well. If antibodies for this antigen are present in the blood, they will bind to the antigen.
3. The blood plasma is washed out of the well, leaving behind any antibodies bound to the antigen.
If there are antibodies in the well, then you know the person has had an immune response to the pathogen. But how can you tell if antibodies are there or not? They’re such tiny proteins.
A totally different type of antibody is used for the next step. It’s a monoclonal antibody made in the lab, but it’s also a very unusual one. It is an unnatural, designed tool created purely for use in biochemical assays. These antibodies have some very special properties:
• Their antigen-binding sites specifically bind to the constant region of natural antibodies. This means that for these monoclonal antibodies, other antibodies are antigens! (Yes this is confusing, but it’s a good way to check you really understand what ‘antigen’ means.)
• Their constant region is covalently bonded to an enzyme. The presence of the enzyme means that they can’t bind each others’ constant regions - so they are not antigens to themselves. They only bind other types of antibody.
Imagine the chaos in your body if your B-cells released antibodies that could bind to other antibodies’ constant regions! They would be hugely damaging to your immune system. However, these little guys are very useful tools in the lab.
5. These special monoclonal antibodies, with linked enzyme, are added to the well.
• If there ARE (natural) antibodies bound to the antigen in the well, the monoclonal antibodies will bind to their constant region.
• If there are NO (natural) antibodies, the monoclonal antibodies will remain freely floating in the solvent.
6. The well is washed out again.
The monoclonal antibodies, with their linked enzyme, will only remain in the well IF there were (natural) antibodies in the blood sample. Otherwise they would have been washed away in step 6. If there is enzyme in the well, there must have been antibodies in the blood.
But how do we know if there is enzyme in the well..?! This bit is easy, because of the clever choice of enzyme: The enzyme is one that takes a colourless substrate to form a coloured product.
7. Add the substrate, and see what happens! If colour appears, you know the enzyme is present. And the enzyme if present, its monoclonal antibody must be bound to a natural antibody that could bind the antigen from the pathogen.
AQA Exam Question Example - ELISA tests
This exam question requires you to understand both ELISA tests and the immune response. Can you make sense of it?
AS Level Biology OCR A H020/01 Breadth in biology - June 2024 Self Marking Quiz
Self marking quiz for revision of OCR A Breadth in Biology - June 2024
Practising recall is so important for retention and learning. Try this quiz without books first !
Try this quiz - if you found it useful then please ❤️ (at the bottom of the page) and share, you can follow me on instagram - alevelbiologytutor
A Level Biology OCR A H420/02 Biological Diversity - June 2024 Self Marking Quiz
Self marking quiz for revision of OCR A Level Biology A Biological Diversity H420/02 - June 2024
Practising recall is so important for retention and learning. Try this quiz without books first !
A Level Biology OCR A H420/01 Biological Processes - June 2024 Self Marking Quiz
Self marking quiz for revision of OCR A Level Biology A Biological Processes H420 01 - June 2024
Practising recall is so important for retention and learning. Try this quiz without books first !
Mastering Carbohydrates: Your Complete Guide to OCR A Level Biology Specification 2.1.2 (d-g)
Essential Prior Knowledge to Recap
Before diving into these commonly tested topics, ensure you're confident with:
• Basic carbohydrate classification – understanding the terms monosaccharide, disaccharide and polysaccharide, and being able to distinguish between them • Condensation and hydrolysis reactions – knowing that condensation joins molecules together by removing water, whilst hydrolysis breaks bonds by adding water • The concept of monomers and polymers – recognising that large biological molecules are built from smaller repeating units • Chemical bonding basics – understanding covalent bonds and how atoms share electrons to form stable molecules • The relationship between structure and function – appreciating that the shape and properties of molecules determine their biological roles
Mastering Carbohydrates: Your Complete Guide to OCR A Level Biology Specification 2.1.2 (d-g)
Essential Prior Knowledge to Recap
Before diving into these commonly tested topics, ensure you're confident with:
• Basic carbohydrate classification – understanding the terms monosaccharide, disaccharide and polysaccharide, and being able to distinguish between them
• Condensation and hydrolysis reactions – knowing that condensation joins molecules together by removing water, whilst hydrolysis breaks bonds by adding water
• The concept of monomers and polymers – recognising that large biological molecules are built from smaller repeating units
• Chemical bonding basics – understanding covalent bonds and how atoms share electrons to form stable molecules
• The relationship between structure and function – appreciating that the shape and properties of molecules determine their biological roles
Links to GCSE Content
These A Level topics build directly upon your GCSE foundation:
• GCSE carbohydrates – you learned that carbohydrates are made of carbon, hydrogen and oxygen; now you'll explore their precise molecular structures and glycosidic bonds •
GCSE enzymes and digestion – you studied how enzymes break down starch into sugars; now you'll understand the specific bonds being broken and formed
• GCSE cell structure – you know that plant cell walls provide strength; now you'll discover exactly how cellulose molecules create this rigidity through hydrogen bonding
This guide will take you through each specification point systematically, with two carefully selected examination questions for each. By working through these examples with their detailed mark schemes, you'll develop the precise knowledge and examination technique needed to excel in this topic.
Specification Point (d): The ring structure and properties of glucose as an example of a hexose monosaccharide and the structure of ribose as an example of a pentose monosaccharide
This specification point requires you to understand the detailed molecular structures of monosaccharides, distinguish between hexose and pentose sugars, and recognise the difference between α and β glucose.
Example Question 1: Identifying a Pentose Monosaccharide
D – pentose monosaccharide ribose ✓
Detailed Explanation:
This question tests two crucial pieces of knowledge:
Can you count carbon atoms to distinguish pentose from hexose?
Can you name the common pentose and hexose monosaccharides?
Step 1: Count the Carbon Atoms
Looking at the structure carefully:
The ring contains 4 carbon atoms (shown at the corners of the ring where no other atom is labelled)
Plus 1 oxygen atom in the ring (the O shown in the ring)
Plus 1 carbon atom outside the ring as the CH₂OH group
Total = 5 carbon atoms
This is the critical observation: 5 carbons = pentose
Key Definitions:
Pentose = monosaccharide with 5 carbon atoms (penta = five)
General formula: C₅H₁₀O₅
Examples: ribose, deoxyribose, ribulose
Hexose = monosaccharide with 6 carbon atoms (hexa = six)
General formula: C₆H₁₂O₆
Examples: glucose, fructose, galactose
Step 2: Identify the Specific Pentose
Since we've established this is a pentose (5 carbons), we need to identify which pentose.
The most common pentose you need to know for A Level is ribose:
Ribose is found in RNA (ribonucleic acid)
Ribose is found in ATP (adenosine triphosphate)
Ribose forms a 5-membered ring (4 carbons + 1 oxygen)
Why Each Option is Right or Wrong:
Option A: "hexose monosaccharide glucose" ❌
Incorrect because: This molecule has 5 carbons, not 6
Glucose is indeed a hexose, but this structure isn't glucose
Double error: wrong number of carbons AND wrong name
Option B: "hexose monosaccharide ribose" ❌
Incorrect because: Ribose is NOT a hexose
Ribose always has 5 carbons (pentose)
This contradicts the basic definition of ribose
The structure shown does have 5 carbons, but calling it a hexose is wrong
Option C: "pentose monosaccharide glucose" ❌
Incorrect because: Glucose is NOT a pentose
Glucose always has 6 carbons (hexose)
The structure shown is a pentose, but glucose can never be a pentose
Contradicts the fundamental structure of glucose
Option D: "pentose monosaccharide ribose" ✓ CORRECT
Correct because:
The structure has 5 carbons → pentose ✓
Ribose is indeed a pentose ✓
Ribose forms this type of ring structure ✓
Everything matches perfectly
Understanding the Structural Differences:
Ribose (Pentose):
Contains 5 carbon atoms total
Ring formed from 4 carbons + 1 oxygen
1 carbon outside ring as CH₂OH
Formula: C₅H₁₀O₅
Glucose (Hexose):
Contains 6 carbon atoms total
Ring formed from 5 carbons + 1 oxygen
1 carbon outside ring as CH₂OH
Formula: C₆H₁₂O₆
The key difference is that glucose has one extra carbon in the ring compared to ribose.
How to Count Carbons in Ring Structures:
When you see a ring structure in organic chemistry:
Every "corner" or "vertex" without a letter is a carbon atom
If you see just bonds meeting at an angle, that's a carbon
In the structure shown, count the corners: 4 in the ring = 4 carbons
Count any carbon-containing groups outside the ring
CH₂OH = 1 carbon
CH₃ = 1 carbon
COOH = 1 carbon
Don't count oxygen, nitrogen, or other atoms as carbons!
The O in the ring is oxygen, not carbon
OH groups add 1 oxygen, not carbon
Add them all up
In this case: 4 (in ring) + 1 (CH₂OH) = 5 carbons total
Why This Distinction Matters in Biology:
Pentoses (like ribose):
Form the sugar-phosphate backbone of RNA and DNA
RNA contains ribose
DNA contains deoxyribose (ribose minus one oxygen)
Component of ATP (adenosine triphosphate) – the energy currency
Component of NADP and NAD – important coenzymes
Smaller size allows them to fit in nucleic acid structures
Hexoses (like glucose):
Primary respiratory substrates – broken down to release energy
Transported in blood and phloem sap
Polymerised to form storage polysaccharides (starch, glycogen)
Polymerised to form structural polysaccharides (cellulose)
Larger size stores more energy per molecule
Common Student Errors:
❌ Counting the oxygen in the ring as a carbon – this would give you 6 atoms in the ring, leading to confusion
❌ Not counting the CH₂OH carbon – remember this is a carbon atom outside the ring
❌ Confusing ribose with glucose – they're completely different molecules
❌ Thinking ribose can be a hexose – by definition, ribose is always C₅H₁₀O₅
❌ Thinking glucose can be a pentose – by definition, glucose is always C₆H₁₂O₆
Examiner's Comment from Mark Scheme:
"The correct response was D, however, all the other options were selected by different candidates."
This tells us that this question discriminates between candidates who:
Properly understand the definitions of pentose and hexose
Can correctly count carbon atoms in ring structures
Know the names of common monosaccharides
Memory Aids:
For remembering pentose = 5:
PENTose = PENTagon = 5 sides
PENTose = 5 carbons (both start with same sound)
For remembering hexose = 6:
HEXose = HEXagon = 6 sides
HEXose = 6 carbons
For specific molecules:
RIBOSE in RNA (both start with R)
GLUCOSE = GLUCose has 6 carbons (the word looks longer!)
Specification Learning Point:
This question directly addresses the specification requirement to know:
"the ring structure and properties of glucose as an example of a hexose monosaccharide"
"the structure of ribose as an example of a pentose monosaccharide"
You must be able to:
Recognise pentose vs hexose by counting carbons
Name ribose as the key pentose example
Name glucose as the key hexose example
Never confuse these categories – ribose is ALWAYS pentose, glucose is ALWAYS hexose
Practice Tip:
Draw both ribose and glucose structures side by side. Label them clearly:
Ribose: 5C (pentose)
Glucose: 6C (hexose)
Do this repeatedly until you can instantly distinguish them. This is tested frequently in multiple choice questions and is easy marks if you know it!
Example Question 2: Drawing the Structure of Alpha Glucose
(i) Write on the diagram to show the complete structure of alpha glucose. [3 marks]
Mark Scheme:
Correct positions for CH₂OH ✓ (1 mark)
O (oxygen) correctly positioned ✓ (1 mark)
OH and H groups correct on C1 ✓ (1 mark)
Guidance:
Allow bond line to any part of the group (doesn't need perfect attachment)
Allow correct displayed formula (showing all atoms and bonds)
Ignore bond angles (you won't lose marks for imperfect angles)
Model Answer:
The completed structure should show:
CH₂OH group attached to carbon-5, projecting upwards from the ring
Oxygen atom (O) in the ring between carbon-5 and carbon-1
H above and OH below on carbon-1 (this is the α configuration)
Complete Structure Explanation:
Let me walk you through building the complete α-glucose molecule systematically:
Step 1: The Ring Structure
The ring consists of 5 carbons and 1 oxygen
The oxygen sits between carbon-5 and carbon-1
The ring is not perfectly flat – it adopts a "chair" conformation
Step 2: Number the Carbons Working clockwise from the oxygen:
Carbon-1: The anomeric carbon (on the right, next to oxygen)
Carbon-2: Next position clockwise
Carbon-3: Next position clockwise
Carbon-4: Next position clockwise (at the bottom)
Carbon-5: Next to oxygen on the left
Carbon-6: Not in the ring – it's the CH₂OH group attached to C5
Step 3: Position Groups on Each Carbon
Carbon Group Above Group Below C1 H OH (defines α) C2 OH H C3 H OH C4 OH H C5 CH₂OH Part of ring
Step 4: The Critical α Feature On carbon-1, you must have:
H above the plane
OH below the plane
If these were reversed (OH above, H below), you'd have β-glucose instead.
Understanding the Three Marking Points:
Marking Point 1: CH₂OH Group (1 mark)
The CH₂OH group must be positioned correctly:
Attached to carbon-5 (the carbon to the left, next to the oxygen in the ring)
Projects upwards from the ring (in standard Haworth projection)
This is the 6th carbon of glucose (carbon-6)
Why this group matters:
This is what makes glucose a hexose – this is the 6th carbon
This group is involved in forming 1,6 glycosidic bonds in branched polysaccharides
It's a primary alcohol group (-CH₂OH rather than -CHOH)
Common errors:
❌ Putting CH₂OH on the wrong carbon
❌ Writing just CH₃ instead of CH₂OH
❌ Forgetting it entirely
Marking Point 2: Oxygen in the Ring (1 mark)
The oxygen atom must be:
Inside the ring (not outside)
Positioned between carbon-5 and carbon-1
Forms part of the ring structure itself
Why this matters:
Glucose is a cyclic hemiacetal – the ring forms when the -CHO group reacts with the -OH on C5
The oxygen in the ring comes from the -OH group originally on C5
This creates the ring form (which is the predominant form in aqueous solution)
Common errors:
❌ Leaving the oxygen out entirely (making it just a carbon ring)
❌ Putting oxygen outside the ring as OH groups
❌ Putting oxygen in the wrong position in the ring
Marking Point 3: OH and H on Carbon-1 (1 mark)
This is THE critical feature that defines α-glucose:
On carbon-1 (the anomeric carbon):
H must be above the plane of the ring
OH must be below the plane of the ring
Why this is crucial: This single difference distinguishes α from β:
Type Position on C1 Forms which polymers α-glucose OH below Starch, glycogen β-glucose OH above Cellulose
The Biological Consequence:
This seemingly tiny difference has ENORMOUS consequences:
α-glucose:
Forms α-glycosidic bonds in polymers
Creates starch (plants) and glycogen (animals)
We have enzymes (amylase, maltase) that can break these bonds
We can digest starch – that's why we can eat bread, pasta, potatoes, rice
β-glucose:
Forms β-glycosidic bonds in polymers
Creates cellulose (plant cell walls)
We don't have enzymes (cellulase) to break these bonds
We cannot digest cellulose – that's why we can't digest wood, grass, or paper
Common mistakes:
❌ Putting OH above on C1 – this creates β-glucose, not α-glucose (0 marks for this point)
❌ Putting both H and OH on the same side – chemically impossible
❌ Leaving C1 incomplete – you must show what's attached
❌ Forgetting which is which – use a memory aid!
Memory Aids for α vs β:
Method 1: Alphabet order
α (alpha) comes before β (beta) in the alphabet
α has OH below (down = comes before)
β has OH above (up = comes after)
Method 2: Visual
α = Away (OH points away, down from the CH₂OH group)
β = Both up (Both OH and CH₂OH point up, same side)
Method 3: Rhyme
"α is below, β makes it grow (up)"
How to Approach This Question in an Exam:
Step-by-step process:
First, add the oxygen in the ring (between C5 and C1)
This shows you understand it's a ring structure with oxygen
Next, add the CH₂OH to carbon-5 (projecting upwards)
This completes the hexose structure (6 carbons total)
Finally, complete carbon-1 with H above and OH below
Double-check this is α not β
This is the defining feature of α-glucose
Check all other carbons have their groups
C2: OH above, H below
C3: H above, OH below
C4: OH above, H below
(These may already be shown in the incomplete structure)
What the Question Doesn't Penalise:
According to the mark scheme, you won't lose marks for:
Imperfect bond angles (as long as connectivity is clear)
Slightly wonky ring shape
Bonds not perfectly straight
Groups not perfectly positioned as long as it's clear whether they're above or below
What WILL Lose Marks:
✗ Wrong position of CH₂OH (not on C5) ✗ Missing oxygen from the ring ✗ Wrong configuration on C1 (making it β-glucose) ✗ Missing groups entirely
Examiner's Insight:
"This question differentiated well between candidates. Around two-thirds got either the 'O' or the groups on 'C₁' correct and many candidates got both correct. A smaller proportion got the C₆ group correct but almost half achieved full marks. Some candidates, usually those who didn't perform well on the rest of the paper, achieved 0 marks."
What this tells us:
The question is doable – half of candidates got full marks
But it requires precise knowledge – you must know ALL three features
Candidates who didn't know glucose structure at all scored 0
This is a core skill you MUST master
Practice Strategy:
Draw α-glucose 10 times from memory – time yourself
Draw β-glucose 10 times from memory – compare to α
Draw them side by side and label the differences clearly
Cover them up and test yourself – can you draw both perfectly?
Use past paper questions – practice completing partial structures
Key Features of Complete α-Glucose:
6 carbons total (5 in ring + 1 as CH₂OH) = hexose
1 oxygen in the ring (between C5 and C1)
OH below on C1 = α-glucose (key defining feature)
CH₂OH on C5 projecting upwards
Specification Learning Point:
This question directly tests the specification requirement:
"the ring structure and properties of glucose as an example of a hexose monosaccharide"
You must be able to:
✓ Draw the complete ring structure
✓ Show it has 6 carbons (hexose)
✓ Distinguish α from β based on C1 configuration
✓ Complete partial structures accurately
This skill appears in multiple question types and is worth 3 marks – excellent return on investment if you learn it properly!
Specification Point (e): The synthesis and breakdown of a disaccharide and polysaccharide by the formation and breakage of glycosidic bonds
This specification point requires you to understand condensation and hydrolysis reactions, name glycosidic bonds precisely, and recognise specific disaccharides.
Example Question 1: Describing the Glycosidic Bond
Mark Scheme:
(α-)glycosidic (bond) ✓
carbon 1 to carbon 4 (bond) ✓
Alternative acceptable answers:
"(α-)1,4 glycosidic bond" gains both marks
"1,4 bond" gains mark 2 only
Guidance: ✓ Accept marks clearly shown on annotated diagram ✗ Do NOT allow "beta/β" ✗ Do NOT allow "1,6 bond" ✓ Allow "1,4 bond" for second mark ✗ ECF: "β-1,4 glycosidic bond" can get mark 2; "β-1,6 bond" = 0 marks ✗ Ignore references to any named carbohydrate
Model Answer:
"The bond is an α-glycosidic bond formed between carbon 1 of one glucose molecule and carbon 4 of the other glucose molecule."
Or more concisely:
"α-1,4 glycosidic bond"
Detailed Explanation:
Part 1: Bond Type (1 mark)
The bond type is glycosidic. This term is absolutely essential. Let's be clear about what this means:
A glycosidic bond is a covalent bond formed between two monosaccharides
It forms through a condensation reaction (removing H₂O)
The bond links through oxygen: C-O-C
It can be broken by hydrolysis (adding H₂O)
You must use the word "glycosidic" – simply saying "covalent bond" won't gain the mark, even though it's technically correct. The mark scheme requires the specific term.
The α (alpha) prefix indicates that the bond involves α-glucose monomers. Since maltose is made from two α-glucose molecules, it's an α-glycosidic bond.
Part 2: Carbon Positions (1 mark)
The bond forms between:
Carbon-1 of the first glucose (the anomeric carbon where the OH group is below in α-glucose)
Carbon-4 of the second glucose
This is designated as a 1,4 linkage or 1-4 bond.
Why These Numbers Matter:
Different disaccharides have different linkages:
Maltose: α-glucose + α-glucose via 1,4 bond
Sucrose: α-glucose + fructose via 1,2 bond
Lactose: β-galactose + α-glucose via 1,4 bond
In polysaccharides, the type of glycosidic bond determines structure:
1,4 bonds: Create straight chains (or helices)
1,6 bonds: Create branch points
The Condensation Reaction:
When maltose forms:
OH group on C1 of first glucose comes close to OH on C4 of second glucose
The H from one OH and the OH from the other combine to form H₂O (water)
The oxygen left behind forms the bridge: glucose-O-glucose
This is the glycosidic bond
Formation equation:
α-glucose + α-glucose → maltose + water
(C₆H₁₂O₆) + (C₆H₁₂O₆) → (C₁₂H₂₂O₁₁) + (H₂O)
Notice: 12 + 12 = 24 hydrogen atoms, but maltose only has 22, because 2H have been removed as part of water.Common Mistakes:
❌ "Beta glycosidic bond" – maltose contains α-glucose, not β-glucose
❌ "1,6 glycosidic bond" – this describes branch points in amylopectin/glycogen, not maltose
❌ Just "glycosidic" without numbers – you need to specify which carbons
❌ "Hydrogen bond" – completely wrong type of bond ❌ "Peptide bond" – that's for proteins, not carbohydrates
Examiner's Comment from Mark Scheme:
"Most candidates correctly stated that the bond was glycosidic, and many were able to achieve both marks by recognising it as a 1-4 bond. Some candidates lost the second mark by incorrectly stating that it was a 1-6 glycosidic bond."
Exam Technique Tip:
If you're ever unsure about which carbons are involved in a disaccharide bond, look for these clues:
If the molecule is described as "straight" or forms a "chain" → likely 1,4
If there's a "branch" mentioned → look for 1,6
For maltose specifically → always 1,4
Example Question 2: Hydrolysis of a Polysaccharide
Mark Scheme:
H₂O / water ✓
2 / two ✓
Alternative acceptable answers:
Award 1 mark for just H₂O/water alone
Ignore incorrect number (e.g., 3) for first mark
Model Answer:
The completed equation should read:
Maltotriose + 2H₂O → 3 glucose
Or showing the structures:
[3 glucose units joined] + 2 H₂O → 3 × [single glucose]
Detailed Explanation:
Part 1: The Substance Needed (1 mark)
The reaction requires water (H₂O). This is a hydrolysis reaction:
Hydro = water
Lysis = splitting/breaking
Hydrolysis is the opposite of condensation:
Condensation: joins monomers, removes water
Hydrolysis: breaks polymers, adds water
Part 2: The Number of Water Molecules (1 mark)
You need 2 molecules of water to break maltotriose into 3 glucose molecules.
Why 2 and not 3?
This is a crucial concept. Let's think about the bonds:
Maltotriose has three glucose units, which means:
Glucose₁—Glucose₂—Glucose₃
There are 2 glycosidic bonds (one between Glucose₁ and Glucose₂, another between Glucose₂ and Glucose₃)
Each bond requires 1 water molecule to break it
Therefore: 2 bonds = 2 water molecules
The General Rule:
For any polymer:
Number of water molecules needed = Number of monomers - 1
Examples:Disaccharide (2 monomers) → needs 1 H₂O to hydrolyse
Trisaccharide (3 monomers) → needs 2 H₂O to hydrolyse
Polysaccharide (n monomers) → needs (n-1) H₂O to hydrolyse
How Hydrolysis Works:
At each glycosidic bond:
Water molecule approaches the C-O-C bond
The O-H bond in water breaks
H⁺ attaches to one glucose oxygen
OH⁻ attaches to the other glucose carbon
The glycosidic bond breaks: C-O-C becomes C-OH and HO-C
Practical Context:
In your digestive system:
Amylase (in saliva and pancreas) breaks down starch into maltotriose and maltose
Maltase (in small intestine) then breaks these down into glucose
Each bond-breaking step is hydrolysis, requiring water
The glucose is then absorbed into your bloodstream
Common Mistakes:
❌ Writing "3 H₂O" – a common error thinking you need one water per glucose
❌ Forgetting water altogether – the bond won't break without it
❌ Writing "enzyme" instead of water – enzymes catalyse but aren't consumed
❌ Writing the number but not H₂O – you need both for full marks
Examiner's Comment from Mark Scheme:
"This question was generally well-answered. Most candidates knew that water was used for one mark and many correctly understood that two water molecules would be used in this hydrolysis reaction. Some candidates incorrectly suggested that three molecules of water were used, possibly because there were three glucose molecules."
Memory Aid:
Think of monomers as train carriages:
3 carriages are joined by 2 couplings
To separate them, you need to break 2 couplings
Each coupling break needs 1 H₂O
Total = 2 H₂O
Extension Understanding:
In polysaccharides like starch (which might have 1000+ glucose units):
Amylose with 1000 glucose units has 999 glycosidic bonds
Complete hydrolysis would require 999 water molecules
This is why digestion takes time – lots of bonds to break!
Exam Technique:
When you see questions about breaking down polymers:
Count the number of monomers (n)
Calculate bonds = n - 1
Each bond needs 1 H₂O
Always write both the substance (H₂O) and the number
Specification Point (f): The structure of starch (amylose and amylopectin), glycogen and cellulose molecules
This specification point requires detailed knowledge of the four major polysaccharides, their structural differences, and how to distinguish between them.
Example Question 1: Identifying Polysaccharide with Most 1-6 Bonds
Mark Scheme:
Correct Answer: D ✓
Model Answer: D – Glycogen
Detailed Explanation:
This question tests your understanding of how different types of glycosidic bonds create different structures in polysaccharides.
Understanding Glycosidic Bond Types:
There are two main types of glycosidic bonds in these polysaccharides:
1,4 glycosidic bonds:
Link carbon-1 of one glucose to carbon-4 of the next
Create straight chains (or helices in α-glucose polymers)
Form the "backbone" of all these polysaccharides
1,6 glycosidic bonds:
Link carbon-1 of one glucose to carbon-6 (the CH₂OH group) of another
Create branch points
Allow the chain to branch off in a new direction
Analysing Each Option:
A. Amylopectin (INCORRECT)
Structure: Branched, but with relatively few branches
Branching frequency: Approximately every 20-25 glucose units
Percentage of 1,6 bonds: About 4-5%
Has 1,6 bonds, but not the highest proportion
B. Amylose (INCORRECT)
Structure: Completely unbranched helical chain
Contains ONLY α-1,4 glycosidic bonds
Percentage of 1,6 bonds: 0%
Forms a coiled helix due to the angle of 1,4 bonds in α-glucose
C. Cellulose (INCORRECT)
Structure: Completely unbranched straight chains
Contains ONLY β-1,4 glycosidic bonds
Percentage of 1,6 bonds: 0%
Forms straight chains because alternate glucose units are rotated 180°
D. Glycogen (CORRECT) ✓
Structure: Highly branched, with many branch points
Branching frequency: Approximately every 8-12 glucose units
Percentage of 1,6 bonds: About 8-10%
Has the highest proportion of 1,6 bonds of all options
Why Glycogen Has More 1-6 Bonds:
Glycogen is essentially a "super-branched" version of amylopectin:
The Biological Reason:
Why does glycogen have so many more branch points?
Rapid energy release: Animals need to release glucose quickly for sudden energy demands (running from predators, chasing prey, exercise)
More enzyme access: Each branch point creates a "free end" where enzymes can work. More branches = more free ends = faster breakdown
Compact storage: More branching creates a more spherical, compact molecule – important for animals that move around
Higher metabolic rate: Animals generally have higher metabolic rates than plants, so need faster access to stored glucose
Common Mistakes:
❌ Choosing A (Amylopectin) – the most common wrong answer. Students know it's branched but don't realise glycogen is MORE branched
❌ Not understanding "proportion" – the question asks for highest proportion, not just "which one has 1-6 bonds"
❌ Confusing structure with function – knowing glycogen stores energy doesn't help if you don't know its structural details
Examiner's Comment from Mark Scheme:
"Around 4 out of 5 candidates selected the correct response, option D, showing good understanding of glycosidic bonds and polysaccharides. Option A was the most common incorrect response."
Key Learning Points:
0% 1,6 bonds: Amylose and cellulose (unbranched)
~4% 1,6 bonds: Amylopectin (some branches)
~10% 1,6 bonds: Glycogen (highly branched) ← HIGHEST
Memory Aid:
Think: "Glycogen = Greatly branched = Greatest proportion of 1-6 bonds"
Or remember: Animals are more active → need faster energy → more branches → most 1-6 bonds
Example Question 2: Comparing Amylose and Cellulose Structures
Mark Scheme:
Award 1 mark for each correct row irrespective of which box contains the information.
Acceptable answers (any three from):
(contains) α / alpha / A / a (glucose) (contains) β / beta / B / b (glucose)
α / alpha / A / a 1-4 glycosidic bonds β / beta / B / b 1-4 glycosidic bonds
all monomers / AW, same orientation alternate monomers at 180° / AW, to each other
granular / not fibrous fibrous / not granular
H bonds within molecule / no (H) bonds between molecules (H) bonds between adjacent molecules
Guidance: ✓ Accept "every second one is flipped" ✓ Accept fibres / microfibrils / fibrils / macrofibrils ✗ Do NOT credit myofibrils (that's muscle, not cellulose!) ✓ Accept grains for granular ✓ Accept '(cross)links' for 'bonds'
Model Answer:
Amylose Cellulose coiled no coiling contains α-glucose contains β-glucose α-1,4 glycosidic bonds β-1,4 glycosidic bonds all glucose units same orientation alternate glucose units rotated 180°
Or alternatively:
Amylose Cellulose coiled no coiling granular structure fibrous structure no H bonds between chains H bonds between adjacent chains all glucose same way up every other glucose flipped
Detailed Explanation:
Let's explore each structural difference and why it matters:
Difference 1: Type of Glucose Monomer
Amylose: Made from α-glucose
OH group on carbon-1 is below the ring
When joined, all glucose units face the same direction
This creates the possibility of coiling
Cellulose: Made from β-glucose
OH group on carbon-1 is above the ring
Each successive glucose must be rotated 180° to allow bonding
This creates straight chains
Why it matters: The single structural difference in the monomer (OH position on C1) determines whether the polymer coils or forms straight chains.
Difference 2: Type of Glycosidic Bond
Amylose: Contains α-1,4 glycosidic bonds
Links α-glucose monomers
Can be broken by human digestive enzymes (amylase, maltase)
Digestible!
Cellulose: Contains β-1,4 glycosidic bonds
Links β-glucose monomers
Cannot be broken by human digestive enzymes
Indigestible (we lack cellulase enzyme)
Why it matters: This explains why we can digest starch (bread, pasta, potatoes) but not cellulose (grass, wood, paper), even though both are glucose polymers!
Difference 3: Orientation of Monomers
Amylose: All glucose units in same orientation
Every glucose faces the same direction
The CH₂OH groups all project to one side
Allows the molecule to coil into a helix
Cellulose: Alternate glucose units rotated 180°
Every other glucose is flipped
The CH₂OH groups alternate sides
Forces the molecule to remain straight
Why it matters: The alternating orientation is WHY β-glucose forms straight chains – it's structurally impossible for cellulose to coil when alternate monomers face opposite directions.
Difference 4: Overall Shape
Amylose: Coiled / helical
Forms a spiral/helix (like a spring or telephone cord)
The helix is stabilized by hydrogen bonds within the same molecule
Typically 6 glucose units per turn of the helix
Creates a compact structure
Cellulose: Straight chains / no coiling
Remains completely linear
Multiple chains lie parallel to each other
No bending or twisting
Forms microfibrils (bundles of ~60-70 chains)
Why it matters: The straight chains of cellulose can pack tightly together and form extensive hydrogen bonds between chains, creating incredible tensile strength.
Difference 5: Hydrogen Bonding Pattern
Amylose: H bonds within the same molecule
Hydrogen bonds form within the coiled structure
These stabilize the helix
No (or minimal) bonding between separate amylose molecules
Molecules remain separate and granular
Cellulose: H bonds between adjacent molecules
Extensive hydrogen bonding between parallel chains
OH groups on one chain hydrogen bond to OH groups on neighbouring chains
Creates cross-links between chains
Bundles chains together into microfibrils
Why it matters: The inter-chain hydrogen bonding in cellulose is what gives it exceptional strength – comparable to steel! Plant cell walls can withstand enormous pressures because of this.
Difference 6: Physical Form
Amylose: Granular
Forms discrete grains or granules
Stored in starch grains in chloroplasts (plants)
Individual molecules don't form fibres
Appears as white powder when extracted
Cellulose: Fibrous
Forms long fibres (microfibrils → macrofibrils)
These fibres are embedded in the plant cell wall
Gives cell walls their strength and structure
Visible as stringy material (think celery strings)
Why it matters: The fibrous nature is essential for cellulose's structural role, whilst the granular nature suits amylose's storage role.
Common Mistakes:
❌ Writing about glycogen or amylopectin – the question specifically asks about amylose
❌ Using "myofibrils" – that's muscle tissue, not plant cells!
❌ Not comparing like with like – saying "amylose is coiled" and "cellulose contains β-glucose" in the same row doesn't work
❌ Describing function instead of structure – "amylose stores energy" vs "cellulose provides strength" won't gain marks
❌ Adding a 4th or 5th row – only the first 3 rows after the given row are marked
Examiner's Comment from Mark Scheme:
"This question was not answered well. Most candidates gained 1 or 2 marks, usually for identifying α- and β-glucose as subunits, the fibrous nature of cellulose or the arrangement of hydrogen bonding. Few got full marks. A significant minority used terms associated with protein structure and gained no credit. Similarly, many candidates gave differences relating to function rather than structure and gained no credit."
Exam Technique:
When answering comparison tables:
Read what's already provided – use it as a clue for the level of detail needed
Keep comparisons in the same row – left box should relate to right box
Use "vs" thinking – α vs β, coiled vs straight, within vs between
Stick to structure, not function – unless the question explicitly asks for function
Check you've filled enough rows – but not too many (only first 3 marked)
Specification Point (g): How the structures and properties of glucose, starch, glycogen and cellulose molecules relate to their functions in living organisms
This is arguably the most important specification point – linking molecular structure to biological function. This type of question appears repeatedly and often carries high mark allocations.
Example Question 1: Properties and Functions of Glucose, Starch and Glycogen
Mark Scheme:
Glucose:
soluble / polar ✓
has chemical energy in its bonds OR is a respiratory substrate / source of energy ✓
Starch / Glycogen:
insoluble and compact OR large(r) SA ✓
used for (energy / glucose) storage / allows quick release (of stored energy / glucose) ✓
idea that glycogen is broken down faster than starch due to higher SA / many branch ends ✓
Guidance: ✗ Ignore descriptions of structure (e.g., 'glycogen is branched') ✗ Ignore misspelling of 'glycogen' throughout ✓ Allow "releases energy/ATP" ✗ Ignore "starch/glycogen can be stored" ✗ Ignore "broken down more easily" (needs to be about speed/rate)
Maximum 4 marks total
Model Answer:
Glucose properties and functions: "Glucose is soluble in water because it's a polar molecule with many OH groups that can form hydrogen bonds with water. This allows glucose to be transported in solution in blood plasma (animals) or phloem sap (plants).
Glucose contains chemical energy stored in its C-H and C-C bonds. When these bonds are broken during respiration, the energy is used to synthesize ATP. Glucose is therefore the primary respiratory substrate that provides energy for cellular processes."
Starch and glycogen properties and functions: "Both starch and glycogen are insoluble in water, so they have no osmotic effect on cells. This means they can be stored in large quantities without affecting the cell's water potential or causing water to move into the cell by osmosis, which would cause the cell to swell and potentially burst.
Both molecules are compact (especially glycogen with its highly branched structure), taking up relatively little space whilst storing large amounts of glucose. This allows cells to store substantial energy reserves without requiring excessive volume.
Both serve as energy storage molecules that can be hydrolysed to release glucose when energy is needed. However, glycogen is broken down more rapidly than starch because it is more highly branched. The greater number of branch points (1-6 glycosidic bonds) creates many free ends where enzymes can simultaneously attach and break off glucose units. This rapid mobilization is essential for animals, which have higher metabolic rates and may need sudden bursts of energy."
Detailed Explanation:
Let's break down how to construct perfect structure-function links:
GLUCOSE – Property 1: Solubility
Structure → Property → Function chain:
Structure:
Small molecule (C₆H₁₂O₆)
Contains 5 hydroxyl (OH) groups
Polar molecule
Property:
Soluble in water (hydrophilic)
Can dissolve to high concentrations
Function:
Can be transported in aqueous solutions:
In blood plasma (animals)
In phloem sap (plants)
Through cytoplasm
Can be delivered to all cells that need energy
Crosses cell membranes via specific transport proteins
Why this matters: If glucose weren't soluble, it couldn't be distributed around organisms. The blood glucose concentration of ~5 mM provides a constant supply to respiring cells.
GLUCOSE – Property 2: Energy Content
Structure → Property → Function chain:
Structure:
Contains multiple C-H bonds
Contains C-C bonds
Contains C-O bonds
Ring structure can be opened and broken down
Property:
Energy-rich molecule
Contains ~2880 kJ of energy per mole
Relatively unstable (can be oxidized)
Function:
Primary respiratory substrate
Broken down in glycolysis → Krebs cycle → electron transport chain
Produces ATP for cellular processes
Provides energy for:
Active transport
Synthesis of molecules
Movement
Cell division
Maintaining body temperature
Why this matters: Glucose is the universal cellular fuel. Nearly all organisms can respire glucose to release energy.
STARCH/GLYCOGEN – Property 1: Insolubility
Structure → Property → Function chain:
Structure:
Very large molecules (polymers of thousands of glucose units)
Compact, coiled/branched shape
Few free OH groups on the exterior
Property:
Insoluble in water
Does not dissolve
Metabolically inactive
Function:
Can be stored without osmotic effects:
Doesn't affect water potential (Ψ)
No water drawn into cells by osmosis
Cells don't swell or burst
Doesn't interfere with cell metabolism
Can store large quantities safely
Why this matters: Imagine if cells stored glucose instead:
If a liver cell stored the same amount of energy as glucose instead of glycogen, the osmotic effect would draw in so much water the cell would burst!
Glucose concentration of equivalent energy would be ~400 mM (compared to blood's 5 mM), creating huge osmotic gradient
STARCH/GLYCOGEN – Property 2: Compactness
Structure → Property → Function chain:
Structure:
Coiled (amylose) or branched (amylopectin/glycogen) structure
Folds into dense, compact shape
Glycogen especially: highly branched → spherical shape
Property:
Very compact
High energy density
Small volume:energy ratio
Function:
Can store large amounts of energy in small space:
Liver cells packed with glycogen granules
Starch grains in chloroplasts
Doesn't take up excessive cell volume
Leaves space for other organelles and processes
Particularly important in animals that need to move
Why this matters:
Humans store about 400g of glycogen (liver + muscles)
This provides about 1600 kcal of energy
If stored as glucose, it would require massive amounts of space and create devastating osmotic problems
STARCH/GLYCOGEN – Property 3: Storage and Release
Structure → Property → Function chain:
Structure:
Polymer of α-glucose units
Connected by α-glycosidic bonds
Can be hydrolysed by enzymes we possess
Property:
Can be easily broken down by enzymes
Hydrolysis releases glucose monomers
Reversible synthesis/breakdown
Function:
Stores glucose for later use
Can be mobilized when energy needed:
During exercise (animals)
At night when no photosynthesis (plants)
During fasting/starvation
Glucose released enters cellular respiration
Why this matters: This provides a buffer between energy supply and demand – organisms don't need constant food intake.
GLYCOGEN vs STARCH – The Critical Comparison
Structure → Property → Function chain:
Glycogen Structure:
Highly branched (branch every ~10 glucose)
More 1-6 glycosidic bonds (~10%)
More compact and spherical
Starch (Amylopectin) Structure:
Less branched (branch every ~25 glucose)
Fewer 1-6 glycosidic bonds (~4%)
Less compact
Property:
Glycogen has many more free ends
Greater surface area for enzyme attachment
More sites for simultaneous hydrolysis
Function:
Glycogen can be broken down more rapidly
Releases glucose faster when needed
Suits animals with:
Higher metabolic rates
Need for sudden energy bursts
Active lifestyles
Why this matters:
A cheetah chasing prey needs instant glucose release from muscles
A plant growing slowly over months doesn't need such rapid mobilization
The structural difference (branching frequency) directly determines functional difference (release rate)
Examiner's Comment from Mark Scheme:
"An excellent discriminator with only the most able candidates achieving the full 4 marks in a well-organised and concise response. Almost all candidates had some knowledge to share even if it was often confused and organised poorly. Less able candidates described the general structure of the carbohydrates while a few included the structure of cellulose. The most frequently given marks were glucose being soluble, glucose being used in respiration and starch or glycogen being used for storage. Some common mistakes included: easy release of glucose from the polysaccharides rather than rapid release, or not comparing the potential rate of release in glycogen to that in starch."
Common Mistakes:
❌ Describing structure without linking to function: "Glycogen is branched" (so what? why does that matter?) ✓ Correct approach: "Glycogen is highly branched, which creates many free ends where enzymes can work, allowing rapid glucose release"
❌ Vague function statements: "Glucose provides energy" ✓ Better: "Glucose is a respiratory substrate that releases energy when oxidized during aerobic respiration"
❌ Missing the comparison: Discussing glycogen and starch separately without comparing their rate of breakdown ✓ Correct: "Glycogen is broken down faster than starch because it has more branch points"
❌ Confusing "easy" with "fast": "Glycogen is easily broken down" ✓ Correct: "Glycogen is broken down rapidly/quickly"
❌ Including irrelevant structures: Discussing cellulose in an answer about energy storage
Top Exam Technique Tips:
Use the Structure → Property → Function framework
Don't just say "glucose is soluble" – explain that small size and OH groups make it polar, so it dissolves in water, so it can be transported in blood
Make explicit comparisons when asked
Use comparative language: "more than", "faster than", "unlike"
"Glycogen has MORE branches than starch, creating MORE free ends, allowing FASTER breakdown"
Link to real biology
"This is important because animals need rapid energy release for movement/exercise"
Shows you understand why these properties matter
Organize your answer clearly
Write about glucose first
Then starch and glycogen together (their similarities)
Then glycogen vs starch (their differences)
Use precise terminology
"Osmotic effect" not just "affects the cell"
"Respiratory substrate" not just "gives energy"
"Hydrolysed" not just "broken down"
Example Question 2: Why Store Glycogen Instead of Glucose?
Mark Scheme:
Any three from:
Glycogen is:
insoluble, so has no effect on water potential / Ψ (of cell) ✓
metabolically inactive ✓
compact / lots can be stored in a small space ✓
able to store large amounts / lots of energy ✓
(highly branched so) has lots of ends for adding / removing glucose (when needed) OR can be broken down fast / quickly / rapidly to release glucose ✓
Guidance: ✓ Accept ORA (or reverse argument) for glucose for points 1, 2, 3 & 4 only ✓ For point 1: Accept "insoluble so has no osmotic effect (on cell)" ✗ For point 5: Ignore references to surface area ✗ For point 5: Ignore "energy release" in this context
Note: "Compact so can store large amounts of energy" = 2 marks (points 3 & 4)
Model Answer:
"Mammals store glycogen rather than glucose because:
Glycogen is insoluble, whereas glucose is soluble. This means glycogen has no osmotic effect on cells. If glucose were stored at high concentrations, it would lower the cell's water potential dramatically, causing water to move into the cell by osmosis, potentially causing the cell to swell and lyse (burst). Glycogen storage avoids this problem entirely.
Glycogen is very compact due to its highly branched structure, allowing large amounts of glucose to be stored in a small volume. A liver cell can store far more energy as glycogen granules than it could as free glucose without taking up excessive space needed for other cellular structures and processes.
Glycogen's highly branched structure creates many free ends (branch points) where enzymes can simultaneously attach. This allows glucose to be rapidly released when energy is needed – essential for mammals with high metabolic rates or during exercise when energy demands suddenly increase."
Detailed Explanation:
This question is asking you to compare storing as glycogen versus storing as glucose. Let's explore each advantage in detail:
Advantage 1: No Osmotic Problems (MOST IMPORTANT)
The Problem with Storing Glucose:
If a liver cell tried to store the same amount of energy as free glucose molecules instead of glycogen:
A typical liver cell stores about 8% of its mass as glycogen
This represents thousands of glucose molecules per glycogen molecule
If stored as free glucose, the concentration would be approximately 400 mM
Compare this to normal blood glucose: 5 mM
The osmotic catastrophe:
Water potential (Ψ) = Pressure potential (Ψp) + Solute potential (Ψs)
High glucose concentration means:
Very negative solute potential inside the cell
Very negative water potential inside the cell
Water potential outside cell is much higher (less negative)
Water moves into the cell by osmosis down the Ψ gradient
Cell swells and potentially bursts (lysis)
The glycogen solution:
Glycogen molecules are huge (molecular mass: 1-10 million Da)
One glycogen molecule might contain 60,000 glucose units
But it only contributes 1 particle to osmotic concentration
Effectively reduces osmotic concentration by 60,000-fold
No significant osmotic effect on the cell
Analogy: It's like the difference between having:
60,000 individual pennies scattered in a room (very cluttered, affects space)
ONE £600 note (same value, negligible space)
Advantage 2: Compact Storage / Space Efficiency
Physical Compactness:
Glycogen structure:
Highly branched (every 8-12 glucose units)
Branches branch further (up to 12 tiers of branching)
Forms a roughly spherical, compact granule
Dense, tightly packed structure
Glucose storage:
Individual small molecules
Would be dispersed throughout cytoplasm
Cannot pack efficiently
Would fill the cell
Quantitative Comparison:
In a liver cell:
As glycogen: ~100-400 glycogen granules, each about 10-40 nm diameter
As glucose: Would require the same number of molecules but dispersed, occupying far more cytoplasmic space
Energy Density:
Glycogen: High energy density – lots of energy in small volume
Glucose: Low energy density – same energy needs huge volume
Why this matters for mammals:
Mammals need to:
Move – excess weight/volume is disadvantageous
Maintain other cell functions – need space for organelles
Store substantial reserves – might not eat for hours
A human stores about 400g of glycogen (liver + muscles):
This provides ~1600 kcal of readily available energy
Enough for about 90 minutes of running
If stored as glucose, would require impossible amounts of space
Advantage 3: Rapid Mobilization
Structural Basis:
Glycogen's branching pattern:
Branch every 8-12 glucose units
Creates many free ends (non-reducing ends)
Each branch point is a 1-6 glycosidic bond
Enzyme Action:
Glycogen phosphorylase removes glucose units from free ends
More free ends = more enzyme binding sites
Multiple enzymes can work simultaneously
Result: Rapid release of many glucose molecules at once
Quantitative Effect:
Imagine a glycogen molecule with 10,000 glucose units:
If unbranched (like amylose): Only 2 free ends (one at each end of the chain)
If highly branched (like glycogen): Potentially hundreds of free ends
Rate of glucose release:
Unbranched: Limited by having only 2 sites for enzyme action
Highly branched: Dramatically faster due to hundreds of simultaneous sites
Why this matters for mammals:
Mammals frequently need sudden energy bursts:
Exercise: Muscle contraction requires immediate ATP
Glycogen in muscles broken down rapidly
Releases glucose for respiration
Provides ATP within seconds
Fight or flight: Stress response needs quick energy
Adrenaline triggers glycogen breakdown
Liver releases glucose into blood
Raises blood glucose rapidly
High metabolic rate: Mammals are endotherms
Maintain constant body temperature
Requires continuous energy supply
Need ability to quickly access reserves
Contrast with plants:
Plants don't move
Lower metabolic rate
Less urgent energy demands
Can use less-branched starch (amylopectin)
Additional Advantage: Metabolically Inactive
What this means:
Glycogen doesn't participate in other metabolic reactions
It's chemically inert until deliberately broken down
Won't interfere with cellular processes
Stable storage form
Why this matters:
Glucose is reactive – enters many metabolic pathways:
Glycolysis (immediate breakdown)
Pentose phosphate pathway
Protein glycosylation
Production of other sugars
Storing as glucose would make it immediately available for metabolism
Can't build up reserves if it's constantly being used
Glycogen provides a reservoir that's only tapped when needed
Common Mistakes:
❌ "Glycogen stores energy" – too vague, doesn't explain WHY it's better than glucose ✓ Better: "Glycogen can store large amounts of energy in a small space"
❌ "Glycogen is easily broken down" – the word "easily" doesn't credit ✓ Better: "Glycogen can be broken down rapidly/quickly"
❌ "Glycogen has no osmotic potential" – incorrect terminology ✓ Better: "Glycogen has no effect on water potential" or "no osmotic effect"
❌ "Glycogen has more surface area" – mark scheme says to ignore this ✓ Better: "Glycogen has many free ends where enzymes can work"
❌ Missing the comparison – only describing glycogen, not explaining why it's better than glucose ✓ Better: Explicitly compare: "Unlike glucose, glycogen..."
Examiner's Comment from Mark Scheme:
"Candidates understood that glycogen is more compact than glucose, but didn't usually go on to explain that it stores large amounts of energy. Many commented that glycogen is insoluble, but didn't explain that it can be stored without any water potential implications for cells. A large number of candidates substituted 'energy' for 'glucose' when describing how the structure of glycogen allows a rapid release of glucose. There was a tendency to describe removal of glucose as 'easy' rather than 'fast'."
Perfect Answer Structure:
A full-mark answer would be:
"Glycogen is insoluble, so has no osmotic effect on liver cells – unlike glucose which would draw water into cells and potentially cause them to burst.
Glycogen is very compact, allowing large amounts of energy to be stored in a small space – this is essential for mammals that need to move.
Glycogen is highly branched with many free ends, allowing rapid release of glucose when energy is needed – important for mammals' high metabolic rates and sudden energy demands."
This hits 5 marking points but you only need 3 for full marks!
Memory Technique:
Remember "I-C-R":
Insoluble → no osmotic problems
Compact → space-efficient storage
Rapid → fast mobilization when needed
Summary Table: Specification Point (g)
Final Checklist for Specification 2.1.2 (d-g)
Before your exam, ensure you can:
For point (d):
✅ Draw α-glucose and β-glucose accurately, showing OH position on C1
✅ Explain that glucose is a hexose (6C) and ribose is a pentose (5C)
✅ Complete partial ring structures for both glucose and ribose
✅ Count carbon atoms in ring structures correctly
For point (e):
✅ Name glycosidic bonds precisely (α-1,4, α-1,6, β-1,4)
✅ Describe condensation reactions (remove H₂O, form glycosidic bond)
✅ Describe hydrolysis reactions (add H₂O, break glycosidic bond)
✅ Calculate water molecules needed: n monomers need (n-1) H₂O to break apart
✅ Name the disaccharides: maltose, sucrose, lactose
For point (f):
✅ Compare amylose, amylopectin, glycogen, and cellulose structures
✅ State which contain α-glucose (amylose, amylopectin, glycogen) vs β-glucose (cellulose)
✅ State which are branched (amylopectin, glycogen) vs unbranched (amylose, cellulose)
✅ Explain that 1,6 bonds create branch points
✅ Explain that glycogen has more branches than amylopectin
For point (g):
✅ Explain why glucose is soluble and how this aids transport
✅ Explain why glucose is a good respiratory substrate
✅ Explain why starch/glycogen are insoluble (osmotic advantages)
✅ Explain why starch/glycogen are compact (space efficiency)
✅ Explain why glycogen releases glucose faster than starch (more branch points)
✅ Explain why cellulose is strong (H bonds between chains)
✅ Link structure to function using "this allows/enables/means that..."
Recommended Revision Activities
Create flashcards with structures on one side, properties and functions on the other
Draw and redraw glucose structures until you can do them perfectly from memory
Make comparison tables like the one above – creating them yourself aids memory
Practice past paper questions using the examples in this guide, then check the mark schemes
Teach someone else – if you can explain it clearly to another person, you truly understand it
Use the "Structure → Property → Function" framework for every molecule
Create mind maps linking all four specification points together
Final Words
Carbohydrates are fundamental to life and form a significant portion of your A Level Biology course. The key to success is understanding why structures lead to particular properties, and why those properties suit specific functions.
Don't just memorize facts – understand the logic:
Small + soluble = good for transport (glucose)
Large + insoluble = good for storage (starch/glycogen)
Many branches = fast release (glycogen)
Straight chains with H bonds = strong (cellulose)
With the detailed examples and mark schemes in this guide, you now have everything you need to achieve top marks on specification points 2.1.2 (d-g).
Good luck with your studies! 🧬
Remember: Practice doesn't make perfect – practice with detailed feedback makes perfect. Use these mark schemes to understand not just what to write, but WHY those answers gain marks.
Mastering Resting Potential, Action Potential and Propagation: Common OCR A Level Biology Questions Answered
Prior Knowledge to Recap
Before diving into action potentials, make sure you're confident with these key concepts:
• Electrochemical gradients – understanding that ions move due to both concentration differences AND electrical charge differences across membranes is fundamental to grasping the resting potential
• Active transport mechanisms – the sodium-potassium pump uses ATP to move ions against their concentration gradients, which is essential for establishing the resting potential
• Channel proteins and their properties – knowing the difference between always-open channels, voltage-gated channels, and ligand-gated channels helps you understand different phases of the action potential
• Membrane permeability – appreciating that the lipid bilayer is impermeable to ions (they must use channels) and that different ions have different permeabilities explains why the resting potential exists
• Positive and negative ions – being clear about which ions carry positive charges (Na⁺, K⁺) and understanding how their movement affects the charge across the membrane
Links to GCSE Content
This topic builds directly on your GCSE Biology knowledge:
• Electrical impulses in nerves – at GCSE you learned that nerves carry electrical signals; now you'll understand the precise mechanism of how these electrical signals are generated and transmitted
• Movement of substances – GCSE covered diffusion and active transport; the action potential uses both of these processes as ions move through channels (diffusion) while the sodium-potassium pump works constantly (active transport)
• The nervous system – you learned that electrical impulses travel along neurones; A level reveals exactly how the membrane potential changes from -70mV to +30mV and back again, and how this "wave" propagates along the axon
Common Question Types and How to Answer Them
Let me walk you through five frequently asked questions from past OCR papers that specifically target resting potential, action potential, and propagation.
Question 1: Understanding What Happens During an Action Potential
Answer: B ✓
How to work through this systematically:
The key to these questions is understanding what's happening at each stage of the action potential. Let me break down the graph positions:
Position 1 (Resting potential at -70mV):
The membrane is at rest
Na⁺/K⁺ pump: Operating (it ALWAYS operates - this is crucial!)
Na⁺ channels: Closed
K⁺ channels: Some open (the membrane is slightly permeable to K⁺ at rest)
Position 2 (Rising phase - Depolarisation):
Membrane potential is becoming less negative/more positive
Na⁺/K⁺ pump: Still operating (never stops!)
Na⁺ channels: OPEN ← This is the cause of depolarisation
K⁺ channels: Closed (haven't opened yet)
Position 3 (Peak at +30mV):
Maximum depolarisation reached
Na⁺/K⁺ pump: Still operating
Na⁺ channels: Closing/inactivating
K⁺ channels: Just opening
Position 4 (Falling phase - Repolarisation):
Membrane potential returning to negative
Na⁺/K⁺ pump: Still operating
Na⁺ channels: Closed
K⁺ channels: OPEN ← This is the cause of repolarisation
Therefore, B is correct because at position 2 (depolarisation):
✓ Na⁺/K⁺-pump IS operating (yes)
✓ Voltage-gated Na⁺ channels ARE open (yes)
✓ Voltage-gated K⁺ channels are NOT open yet (no)
CRITICAL MISCONCEPTION TO AVOID:
Many students think the sodium-potassium pump only works during certain phases or switches on to restore the resting potential. This is wrong!
The markscheme confirms that the pump operates continuously throughout ALL phases of the action potential. It's constantly pumping 3Na⁺ out and 2K⁺ in, using ATP, maintaining the concentration gradients that make the action potential possible.
Memory aid for what causes what:
Na⁺ channels open → sodium RUSHES IN → depolarisation (UP)
K⁺ channels open → potassium RUSHES OUT → repolarisation (DOWN)
Na⁺/K⁺ pump → ALWAYS RUNNING → maintains gradients
Question 2: Identifying Phases of the Action Potential
Answer: B ✓
How to identify each phase correctly:
You need to know the precise definitions of each term:
Depolarisation:
Membrane potential becomes less negative (moving towards 0mV and beyond to positive values)
Caused by Na⁺ channels opening → Na⁺ rushing IN
On the graph: the rising/upward phase
Position 2 shows depolarisation ✓
Repolarisation:
Membrane potential returns to resting potential (becoming more negative again)
Caused by K⁺ channels opening → K⁺ rushing OUT
On the graph: the falling/downward phase
Position 4 shows repolarisation
Hyperpolarisation:
Membrane potential becomes MORE negative than resting potential (goes below -70mV)
Caused by K⁺ channels staying open slightly too long
On the graph: the dip below the resting potential line
Position 5 shows hyperpolarisation ✓
Return to resting potential:
Membrane potential returns to exactly -70mV
Sodium-potassium pump activity maintains this
Position 6 shows return to resting potential
Therefore B is correct:
✓ Depolarisation at position 2 (going UP)
✓ Hyperpolarisation at position 5 (dipping BELOW -70mV)
Why the others are wrong:
A: Position 4 is repolarisation (not depolarisation), position 6 is resting potential (not hyperpolarisation)
C: Position 6 is resting potential, not repolarisation (repolarisation is the falling phase at position 4)
D: Position 6 is resting potential (not hyperpolarisation) - hyperpolarisation is the dip at position 5
Exam technique: Draw a line at -70mV on the graph. Anything:
Going above this = depolarisation
Coming back down to it = repolarisation
Going below it = hyperpolarisation
At -70mV and stable = resting potential
Top tip: Learn this sequence by heart: Resting → Depolarisation → Repolarisation → Hyperpolarisation → Return to Resting
Question 3: Understanding Repolarisation at the Molecular Level
Answer: A ✓
Let's work through the logic:
What is repolarisation?
The membrane potential is returning from positive (+30mV) back towards negative (-70mV)
The inside of the cell is becoming more negative again
On a graph, this is the downward/falling phase
What needs to happen to cause this?
For the inside to become more negative, we need positive ions to leave the cell.
Step 1: What happens to sodium channels?
During depolarisation, Na⁺ channels were open (letting Na⁺ rush in)
During repolarisation, Na⁺ channels must be CLOSED
This stops positive sodium ions from entering
Eliminates options B and C
Step 2: What happens to potassium channels?
K⁺ channels OPEN during repolarisation
K⁺ ions rush OUT of the cell (down their concentration gradient)
This removes positive charge from inside the cell
This makes the inside more negative
Confirms options A or D
Step 3: Is membrane potential increasing or decreasing?
This is where you need to be careful with terminology!
"Membrane potential" refers to the voltage value
At the peak: +30mV (a high value)
During repolarisation: moving from +30mV back to -70mV
The value is going from +30 → 0 → -70
The numerical value is DECREASING (getting smaller/more negative)
Therefore A is correct:
✓ Sodium channels: closed
✓ Potassium channels: open
✓ Membrane potential: decreasing (from +30mV towards -70mV)
Common mistake: Students often think "decreasing" means "becoming more negative" so they choose the wrong answer. Think about the actual numbers: +30 to -70 is a decrease in value (even though it's becoming more negative).
Memory aid:
Depolarisation = sodium channels open, potential goes UP
Repolarisation = potassium channels open, potential goes DOWN (decreasing)
Question 4: How TTX Affects Action Potentials (Extended Response)
Model Answer using markscheme points:
"Sodium ions/Na ions/Na⁺ cannot enter (the neurone)" ✓
"No/prevents depolarisation of membrane" ✓
"(Membrane) remains at resting potential" ✓
"Prevents action potential being generated" ✓
"Impulse not conducted (along axon)" ✓
"(So) no release of neurotransmitter" ✓
(Award 4 marks maximum from these points)
Markscheme guidance - What to write:
DO NOT ALLOW "cannot enter membrane" - they enter the neurone/cell, not the membrane
ALLOW "sodium ions/Na ions/Na⁺ stay outside"
ALLOW "action potential" for "impulse"
Markscheme guidance - Award 3 max if: The explanation refers to what would normally happen in a neurone instead of what happens in the presence of TTX
How to structure your answer:
Think about the sequence of events that's being blocked:
Na⁺ channels can't open (given in question) ↓
Na⁺ can't enter ✓ ↓
No depolarisation ✓ ↓
Membrane stays at resting potential ✓ ↓
No action potential generated ✓ ↓
No impulse conduction ✓ ↓
No neurotransmitter release ✓
Examiner insight from markscheme:
"Higher ability candidates were able to demonstrate understanding of the transmission of nerve impulses and the consequences of voltage-gated sodium ion channels being unable to open. Responses from lower ability candidates often lacked detail such as not stating that it is the axon membrane that is not depolarised. Some responses also showed confusion regarding the concepts."
What makes a great 4-mark answer:
"TTX prevents voltage-gated sodium channels from opening, so sodium ions cannot enter the neurone. This prevents depolarisation of the axon membrane, which remains at resting potential of -70mV. Therefore, no action potential is generated and the impulse cannot be conducted along the axon."
This gets 4 marks because it:
States Na⁺ can't enter ✓
States no depolarisation ✓
States membrane remains at resting potential ✓
States no action potential generated ✓
Common mistakes to avoid:
Don't say "cannot enter membrane" - say "cannot enter neurone/cell"
Don't just describe what happens normally - explain what happens with TTX
Don't forget to specify it's the axon membrane that doesn't depolarise
Don't confuse the sequence - Na⁺ must enter before depolarisation can occur
Question 5: Identifying Key Events on an Action Potential Graph
Answer: (B and) C ✓
Markscheme guidance:
Mark the first answer(s)
If the answer is correct and an additional answer is given that is incorrect or contradicts the correct answer, then = 0 marks
Examiner insight: "Most candidates answered this correctly, although some did only mention B and so were not awarded the mark."
Why both B and C?
Let me explain what's happening at each position:
Position A: Resting potential (-70mV) - channels closed
Position B: Early depolarisation - channels OPENING
Position C: Rapid depolarisation - channels FULLY OPEN
Position D: Peak (+30mV) - channels starting to CLOSE
Position E: Early repolarisation - channels CLOSED
Position F: Hyperpolarisation - channels closed
Position G: Return to resting - channels closed
The key point: Voltage-gated sodium channels open during the rising phase of depolarisation. This includes both the early phase (B) and the steep upward phase (C). They're open throughout the depolarisation until the peak is reached.
You must give BOTH B and C to get the mark!
Part (ii): Repolarisation. (1 mark)
Answer: D and E ✓
Markscheme guidance:
Mark the first 2 answers
If the answer is correct and an additional answer is given that is incorrect or contradicts the correct answer, then = 0 marks
IGNORE F
Examiner insight: "Candidates often only stated E, less frequently D alone, while both were required for the mark."
Why both D and E?
Repolarisation is the process of the membrane potential returning from positive back to negative (from +30mV back towards -70mV).
Position D: The start of repolarisation (just after the peak, beginning to fall)
Position E: Continuation of repolarisation (falling steeply)
Position F: This is hyperpolarisation, NOT repolarisation (below -70mV)
Repolarisation is the entire falling phase from peak to resting potential, so includes both D and E.
Common mistake: Students often only give E (the steepest falling part) and forget that repolarisation starts at D (immediately after the peak).
Part (iii): Sodium ions are actively pumped out of the neurone. (1 mark)
Answer: All individual letters A to G / A to G / A – G ✓
OR: F ✓
OR: A and G ✓
Markscheme guidance:
CREDIT all letters A to G as the pump runs continuously
CREDIT F and/or A and G as these are the places where the pump has greatest effect
IGNORE B if given as an additional answer to an otherwise correct answer
Examiner insight: "Candidates did not appreciate that the sodium ion pump is not voltage-regulated and so is actively pumping the whole time. Allowance was made for this in the mark scheme and various combinations of letters were credited."
Why this is tricky:
This question tests a crucial concept: The sodium-potassium pump operates CONTINUOUSLY
Unlike the voltage-gated channels that open and close in response to voltage changes, the Na⁺/K⁺ pump:
Works all the time
Uses ATP constantly
Is NOT voltage-gated
Pumps 3Na⁺ out and 2K⁺ in continuously
Three acceptable answers:
"All letters A to G" - because the pump operates throughout the entire action potential ✓
"F" or "A and G" - because the pump has the greatest visible effect during resting potential and hyperpolarisation when it's restoring the resting potential ✓
Various combinations showing understanding it's always working
The key understanding:
During the action potential:
Voltage-gated channels cause the rapid changes (depolarisation and repolarisation)
The pump works in the background continuously, maintaining the gradients
The pump doesn't cause depolarisation or repolarisation, but without it constantly working, the concentration gradients would eventually run down and action potentials would be impossible.
Perfect answer: "A to G" (showing you know it's always operating)
Also acceptable: "A and G" (showing you know when it's most important for restoring resting potential)
Essential Concepts You MUST Understand
The Resting Potential (-70mV)
What creates it?
Sodium-potassium pump actively transports:
3Na⁺ OUT of the cell
2K⁺ IN to the cell
Uses ATP
Creates concentration gradients
Different permeabilities:
Membrane is MORE permeable to K⁺ (some K⁺ channels open)
Membrane is LESS permeable to Na⁺ (Na⁺ channels closed)
K⁺ diffuses out down its concentration gradient
This makes inside negative relative to outside
Result:
Inside of cell: negative (-70mV)
Outside of cell: positive (0mV)
Membrane is polarised
markscheme:
"Have a resting potential of approximately −70 mV" applies to B (both sensory and motor neurones) ✓
This confirms that all neurones have a similar resting potential of around -70mV.
The Action Potential - Complete Sequence
Phase 1: Resting Potential
Membrane at -70mV
Na⁺ channels: closed
K⁺ channels: some open
Na⁺/K⁺ pump: operating
Phase 2: Depolarisation
Stimulus causes membrane to reach threshold (usually -55mV)
Voltage-gated Na⁺ channels OPEN
Na⁺ rushes IN (down electrochemical gradient)
Membrane potential becomes less negative, then positive
Reaches peak of about +30mV
Na⁺/K⁺ pump: still operating
Phase 3: Repolarisation
Na⁺ channels CLOSE (inactivate)
Voltage-gated K⁺ channels OPEN
K⁺ rushes OUT (down concentration gradient)
Membrane potential becomes negative again
Returns towards -70mV
Na⁺/K⁺ pump: still operating
Phase 4: Hyperpolarisation
K⁺ channels stay open slightly too long
Too much K⁺ leaves
Membrane potential goes below -70mV (e.g., -80mV)
Na⁺/K⁺ pump: still operating
Phase 5: Return to Resting Potential
K⁺ channels close
Na⁺/K⁺ pump restores exact resting potential
Membrane returns to -70mV
Ready for next action potential
Propagation of the Action Potential
How does the action potential move along the axon?
Step 1: Action potential occurs at one region of axon membrane
Step 2: Na⁺ ions entering at this point create local currents
Na⁺ ions move sideways inside the axon
This causes depolarisation of the adjacent membrane region
Step 3: Adjacent region reaches threshold
Voltage-gated Na⁺ channels open in this new region
New action potential generated
Step 4: Process repeats along the axon
Action potential appears to "move" along axon
Actually, it's a wave of depolarisation
Each section generates its own action potential
Step 5: Why doesn't it go backwards?
Refractory period prevents this
After an action potential, Na�+ channels are inactivated
They cannot open again immediately
This ensures one-way transmission
Top Tips Based on Markscheme Guidance
1. The sodium-potassium pump ALWAYS operates:
Don't say it "switches on" during repolarisation
Don't say it only works at certain phases
It runs continuously using ATP
This came up in multiple questions (Q12, Q18)
2. Be precise about "membrane potential decreasing":
Decreasing = numerical value getting smaller
+30 → -70 is a decrease (even though it's more negative)
This is tested in Question 17
3. Know your definitions exactly:
Depolarisation = less negative/more positive
Repolarisation = returning to resting potential (more negative)
Hyperpolarisation = MORE negative than resting potential
Question 13 specifically tests this
4. Specify what ions do:
Don't just say "ions enter" - say which ions!
"Na⁺ cannot enter" (not "cannot enter membrane")
Question 14 markscheme is specific about this
5. For graph questions with multiple letters:
Some processes occur over multiple positions (like depolarisation at B and C)
Read carefully whether you need one letter or several
Question 18 requires multiple letters for several parts
6. Understand the cause-effect sequence:
TTX blocks Na⁺ channels → Na⁺ can't enter → no depolarisation → no action potential
This logical chain is essential for Question 14
What NOT to Write - Common Mistakes from Markschemes
Topic Don't write Do write Question Sodium entry "Cannot enter membrane" "Cannot enter neurone/cell" Q14 Channel notation "Na channels" "Na⁺ channels" / "sodium ion channels" Q18 Pump operation "Pump switches on during repolarisation" "Pump operates continuously" Q12, Q18 Membrane potential change "Potential increases during repolarisation" "Potential decreases during repolarisation" Q17 Hyperpolarisation position "Hyperpolarisation at position 6" "Hyperpolarisation at position 5" Q13 Voltage-gated channels "Channels open due to pressure" "Stretch-sensitive channels / mechanoreceptors" (Different topic)
Understanding Extended Response Questions
Question 15 is a 6-mark question comparing action potentials in different neurones.
Markscheme uses level descriptors:
Level 3 (5-6 marks):
"Comprehensive description of differences with explanations"
"Well-developed line of reasoning, clear and logically-structured"
"Uses scientific terminology appropriately"
Level 2 (3-4 marks):
"Good description with limited explanation"
"Some structure and appropriate scientific language"
"Information mostly relevant"
Level 1 (1-2 marks):
"Limited description with attempted explanation"
"Little structure"
"Inappropriate use of technical terms"
What this means for you:
To get Level 3 (5-6 marks) you MUST:
Describe what you see (e.g., "The dopamine neurone has a longer action potential duration")
Explain why this happens (e.g., "This is because voltage-gated potassium channels open more slowly")
Use correct terminology (depolarisation, voltage-gated channels, etc.)
Structure logically (use paragraphs or linking words like "furthermore")
Simply describing what you see on a graph = maximum Level 2 (4 marks)
You need BOTH description AND explanation for full marks!
Practice Questions to Test Yourself
Based on the markscheme insights, try these:
1. State three ways the sodium-potassium pump is essential for action potentials. (3 marks)
2. Explain why the membrane potential goes below -70mV during hyperpolarisation. (2 marks)
3. A student says "stronger stimuli produce bigger action potentials." Explain why this is incorrect and describe how stimulus strength is actually coded. (3 marks)
4. Describe the role of voltage-gated potassium channels during an action potential. (2 marks)
5. Explain why action potentials can only travel in one direction along an axon. (2 marks)
Model answers available in the markscheme principles we've covered!
Final Exam Checklist
Before your exam, make sure you can:
✓ Explain resting potential (-70mV) in terms of pump activity and membrane permeability
✓ Describe each phase of the action potential with correct terminology
✓ State what happens to each type of channel at each phase
✓ Explain that the pump operates continuously (not just during certain phases)
✓ Identify phases on a graph (depolarisation, repolarisation, hyperpolarisation)
✓ Understand "all-or-nothing" - same size action potentials regardless of stimulus strength
✓ Explain stimulus coding - frequency of action potentials represents stimulus intensity
✓ Describe propagation - local currents, sequential depolarisation, refractory period
✓ Explain the refractory period - ensures one-way transmission
✓ Apply knowledge to novel situations - like TTX blocking sodium channels
Summary: The Big Picture
The action potential is a carefully orchestrated sequence of events:
Resting potential maintained by continuous pump activity and differential permeability
Threshold reached by stimulus causing some depolarisation
Positive feedback as voltage-gated Na⁺ channels open → more depolarisation → more channels open
Rapid depolarisation as Na⁺ floods in
Na⁺ channels inactivate at peak, preventing further entry
K⁺ channels open causing repolarisation as K⁺ leaves
Hyperpolarisation as K⁺ channels close slowly
Pump continues working to maintain gradients for the next action potential
Local currents propagate the depolarisation along the axon
Refractory period ensures one-way transmission
Master this sequence and you'll be able to answer any question on this topic!
Remember: examiners reward precision, correct sequence, and clear explanations that show you understand the mechanisms, not just memorised facts.
Good luck with your revision! ⚡🧠
Pro tip: Draw the action potential graph from memory daily until you can label every phase, every channel opening/closing, and every ion movement without thinking. This is one of the most examined topics in A Level Biology!
OCR A Level Biology: Mastering Biodiversity and Simpson's Index (Section 4.2.1) (a-d)
OCR A Level Biology: Mastering Biodiversity and Simpson's Index (Section 4.2.1 a-d)
Prior Knowledge to Recap
Before diving into biodiversity questions, ensure you understand these foundational concepts:
The three levels of biodiversity: genetic diversity (variation within species), species diversity (number and abundance of species), and habitat/ecosystem diversity (range of different habitats)
Species richness vs species evenness: richness is the total number of different species present, whilst evenness refers to how similar the abundance of each species is
OCR A Level Biology: Mastering Biodiversity and Simpson's Index (Section 4.2.1 a-d)
Prior Knowledge to Recap
Before diving into biodiversity questions, ensure you understand these foundational concepts:
The three levels of biodiversity: genetic diversity (variation within species), species diversity (number and abundance of species), and habitat/ecosystem diversity (range of different habitats)
Species richness vs species evenness: richness is the total number of different species present, whilst evenness refers to how similar the abundance of each species is
Simpson's Index formula: D = 1 - Σ(n/N)² where n is the number of individuals of each species and N is the total number of all individuals
Sampling techniques: random sampling (using coordinates), systematic sampling (transects), and stratified sampling (proportional sampling across different areas)
The purpose of sampling: it's often impractical to count every organism, so representative samples provide estimates of biodiversity
Links to GCSE Content
Ecosystems and communities: understanding how organisms interact within habitats (GCSE Biology)
Variation and classification: recognising that organisms show variation both within and between species (GCSE Biology)
Mathematical skills: calculating percentages, means, and working with formulas (GCSE Maths)
Common Question Types and How to Answer Them
Let me walk you through five frequently asked questions from past OCR papers, showing you exactly what examiners are looking for.
Question 1: Defining Biodiversity
How to Answer:
The correct answer is C: the variety of genes, species and habitats.
This is a straightforward recall question testing whether you know the complete definition. Many students incorrectly choose A because they only think of species diversity, but biodiversity encompasses all three levels: genetic, species, and habitat diversity.
Mark scheme guidance: Award 1 mark for C only.
Common mistake: Option D refers only to genetic diversity within a single species, whilst option A refers only to species diversity. The complete definition of biodiversity must include all three levels.
Question 2: Calculating Simpson's Index
How to Answer:
This question tests your mathematical skills. Follow these steps systematically:
Step 1: Calculate N (total) N = 6 + 7 + 3 + 8 = 24
Step 2: Create a working table
Species n n/N (n/N)² Meadow buttercup 6 0.250 0.063 Common daisy 7 0.292 0.085 Red clover 3 0.125 0.016 Ribwort plantain 8 0.333 0.111
Step 3: Sum the (n/N)² column Σ(n/N)² = 0.063 + 0.085 + 0.016 + 0.111 = 0.275
Step 4: Subtract from 1 D = 1 - 0.275 = 0.725
Step 5: Round to 2 s.f. D = 0.73
Mark scheme guidance:
Correct answer of 0.73 = 3 marks (even without working)
Σ(n/N)² = 0.275 and 1 - Σ = 0.725 = 2 marks
Some correct values for n/N and (n/N)² = 1 mark
Error carried forward allowed if method correct
Top tip: Always add extra columns to tables for your working. This makes your calculations clearer and helps you spot errors. Keep at least 3 decimal places in your working, only round at the final answer.
Question 3: Species Richness vs Species Evenness
Find this question in the PDF: Question 4(b)(i) and (ii) (pages 4-5)
Copy and paste Question 4(b) parts (i) and (ii) from your PDF to see Table 2.1 with the butterfly data.
How to Answer:
(i) Species richness:
Answer: Area 2
Justification: Area 2 has 6 species present (including silver-studded blue), whereas Area 1 has only 5 species (silver-studded blue is absent).
Mark scheme guidance: Award 1 mark for identifying Area 2 with correct justification (more/6 species).
(ii) Species evenness:
Answer: Area 2
Justification: The range of individual numbers is smaller in Area 2 (2-11, range = 9) compared to Area 1 (0-16, range = 16), showing more even distribution of individuals across species.
Mark scheme guidance: Award 1 mark for identifying Area 2 with justification that the range of n is smaller.
Key definitions to remember:
Species richness = the number of different species present
Species evenness = how similar the population sizes are across all species (the relative abundance of each species)
Common mistake: Students often state "Area 2 has more species" without being specific. Always give the actual numbers (6 species vs 5 species) for a strong justification.
Question 4: Sampling Strategy
How to Answer:
Your answer should include three key elements:
1. Sampling strategy (1 mark): Use stratified AND random sampling
2. Explanation of proportional sampling (1 mark): The number of samples within each area should be proportional to their size
3. Specific calculation (1 mark):
Total area = 800 + 2400 + 3200 = 6400 m²
Conifer: (800 ÷ 6400) × 100 = 12.5% → 8 samples (if taking 64 total)
Marshy: (2400 ÷ 6400) × 100 = 37.5% → 24 samples
Grazed: (3200 ÷ 6400) × 100 = 50% → 32 samples
Example full answer: "The scientists should use stratified random sampling. They should divide the ecosystem into the three distinct habitat areas and take samples randomly within each one to avoid bias. The number of samples in each area should be proportional to its size. For example, if taking 64 samples in total: 8 samples in the conifer area (12.5%), 24 in the marshy area (37.5%), and 32 in the heavily grazed area (50%)."
Mark scheme guidance:
Stratified AND random (within each area) = 1 mark
Idea that number of samples should be proportional to area size = 1 mark
Correct suggestion for number of samples (e.g., 8, 24, 32) = 1 mark
Why stratified sampling? When a habitat has distinct different zones or types, stratified sampling ensures all areas are represented fairly in proportion to their size.
Question 5: Interpreting Simpson's Index Values
Copy and paste Question 35 from your PDF to see the multiple choice question about ancient woodland.
How to Answer:
The correct answer is A: Biodiversity is high.
Understanding Simpson's Index values:
The index ranges from 0 to 1
Values close to 1 = high biodiversity (many species, evenly distributed)
Values close to 0 = low biodiversity (few species or one dominant species)
A value of 0.85 is close to 1, indicating high biodiversity
Why the other options are wrong:
Option B is incorrect because 0.85 is high, not low. Values below 0.3 would typically indicate low biodiversity.
Option C is incorrect because Simpson's Index doesn't measure interspecific variation (differences between species as groups). It measures species diversity (richness and evenness).
Option D is incorrect because Simpson's Index doesn't measure intraspecific variation (genetic differences within a single species). That would be genetic diversity, measured differently.
Mark scheme guidance: Award 1 mark for A only.
Critical concept: Don't confuse the types of variation and biodiversity:
Genetic biodiversity = variety of alleles within and between populations (intraspecific)
Species biodiversity = variety and abundance of species (what Simpson's Index measures)
Habitat biodiversity = variety of different habitats in an area
Simpson's Index specifically measures species biodiversity by combining species richness (how many species) and species evenness (how evenly distributed).
Additional Exam Technique Tips
For multiple choice questions: Eliminate obviously wrong answers first. Often you can narrow it down to two options, then think carefully about the precise definitions.
For calculations:
Always show your working in a clear table format
Don't round intermediate values too early (keep 3+ decimal places)
Only round your final answer to the specified number of significant figures
Even if you get the wrong answer, clear working can earn method marks
For "justify" questions: Simply restating the question isn't enough. You must provide specific evidence from the data (e.g., actual numbers, ranges, or calculations).
For sampling questions: Always specify:
The type of sampling (random/systematic/stratified)
How you'd implement it (coordinates, transects, etc.)
The number of samples and why
Time management: These questions appear throughout the papers. Don't spend too long on 1-mark multiple choice questions. If unsure, make an educated guess and move on.
By practising with actual past paper questions in their original format, you'll become familiar with the exam style and what examiners expect
Mastering Neuronal Communication (OCR A 5.1.3 a-c): Common OCR A Level Biology Questions Answered
Mastering Neuronal Communication: Common OCR A Level Biology Questions Answered
Prior Knowledge to Recap
Before diving into neuronal communication, make sure you're confident with these key concepts:
Mastering Neuronal Communication (OCR A 5.1.3 a-c): Common OCR A Level Biology Questions Answered
Prior Knowledge to Recap
Before diving into neuronal communication, make sure you're confident with these key concepts:
• Cell membrane structure – understanding the phospholipid bilayer, channel proteins, and carrier proteins is essential for grasping how ions move across neurone membranes
• Diffusion and active transport – knowing how substances move down concentration gradients (diffusion) and against them (active transport) will help you understand resting and action potentials
• Protein structure – particularly how changes in tertiary structure affect protein function, which is crucial for understanding channel proteins in neurones
• Energy and ATP – comprehending how ATP provides energy for active processes like the sodium-potassium pump
• Specialised cells – recognising how cells adapt their structure to their function will help you appreciate the unique features of different neurone types
Links to GCSE Content
This topic builds directly on your GCSE Biology knowledge:
• Nervous system basics – you'll have learned about the central nervous system (CNS), nerves, and simple reflex arcs at GCSE; A level explores the cellular mechanisms behind these processes
• Homeostasis and responses – GCSE introduced how organisms detect and respond to stimuli; now you'll understand exactly how receptors convert stimuli into electrical signals
• The reflex arc – you studied stimulus → receptor → coordinator → effector → response at GCSE; A level examines the neurones and synapses involved in much greater detail
Common Question Types and How to Answer Them
Let me walk you through five frequently asked questions from past OCR papers, showing you exactly what examiners are looking for.
Question 1: Identifying Neurone Types
Question: Which of the diagrams shows a neurone that connects to an effector?
Answer: C ✓
Why this is correct: A neurone that connects to an effector is a motor neurone. The key identifying features are:
Multiple dendrites branching from the cell body (this receives signals from other neurones)
The cell body is located at one end, typically in the CNS
A long axon extends from the cell body towards the effector
The multipolar structure (many branches from the cell body) is characteristic of motor neurones
Common mistake: Students often choose B, thinking the branched endings connecting to something means it's a motor neurone. However, look carefully at where the cell body is positioned and the overall structure - C shows the classic motor neurone arrangement.
Top tip: Learn to recognize the three neurone types instantly:
Sensory: Cell body positioned along the axon (like D)
Relay: Lots of dendrites, short axon, entirely in CNS (like C, but shorter)
Motor: Cell body at one end with dendrites, long axon (C is the answer!)
Question 2: Understanding the Pacinian Corpuscle
Answer: A ✓
Why this is correct: This demonstrates understanding of how sensory receptors work:
A stimulus produces a generator potential (this is the initial depolarisation at the receptor)
If this generator potential exceeds the threshold value, an action potential is generated
This follows the "all-or-nothing" principle
Why the others are wrong:
B is incorrect because action potentials are always the same size - this is the all-or-nothing law! Stronger stimuli don't make bigger action potentials.
C is wrong because pressure makes the membrane MORE permeable to sodium ions, not less (sodium ions need to enter to cause depolarisation)
D is incorrect because the Pacinian corpuscle converts mechanical energy (pressure) into electrical energy (action potentials), not chemical energy
Crucial concept: Stimulus strength is coded by the frequency of action potentials, never their amplitude. Each action potential is identical in size!
Question 3: Neurone Structure Identification
Answer: C ✓
How to work this out systematically:
Step 1: Identify the neurone type
Look at the cell body position - it's positioned along the length of the neurone (in the middle)
This is the defining feature of a sensory neurone
The direction of travel (from receptor toward CNS) confirms this
Step 2: Identify Structure 7
Structure 7 is on the receptor side, carrying impulses toward the cell body
This is a dendron (carries impulses TO the cell body)
Step 3: Identify Structure 8
Structure 8 carries impulses away from the cell body toward the CNS
This is an axon (carries impulses AWAY FROM the cell body)
Therefore: C is correct - dendron, axon, sensory neurone
Key distinction you MUST know:
Dendron/Dendrite = conducts impulses TOWARDS the cell body
Axon = conducts impulses AWAY FROM the cell body
Memory aid: "Dendron Delivers TO the cell body" - both start with D!
Question 4: The Pacinian Corpuscle as a Transducer (Extended Response)
Model Answer: "It converts mechanical energy into electrical energy" ✓
OR: "It converts energy (mechanical) into another/different form of energy (electrical)" ✓
Markscheme guidance - What to write:
You MUST specify BOTH types of energy
ACCEPT "converts one form of energy into another" BUT it's safer to name them
The energy types must be correct: mechanical IN, electrical OUT
What NOT to write:
Don't just write "pressure" - this isn't specific enough about energy type (markscheme says "IGNORE pressure")
Don't say "converts the stimulus" - be specific about ENERGY transformation
Don't say "kinetic" or "chemical" energy - these are wrong
Examiner insight: The markscheme comments reveal that "many candidates understood that the Pacinian corpuscle is described as a transducer because it transforms one form of energy into another, they often negated their answer by naming the wrong form of energy, such as kinetic or chemical."
Model Answers (you only need ONE of these):
Answer 1: "(The increased pressure) causes sodium (ion) channels to open" ✓
OR
Answer 2: "(Temporary) gaps/holes/spaces appear between the phospholipids/in the bilayer" ✓
Markscheme guidance - What to write:
CREDIT "Na⁺ channels" (with the +)
For answer 2, you must specify the PHOSPHOLIPID bilayer
What NOT to write:
Don't write just "Na channels" without the + symbol - markscheme says "DO NOT CREDIT Na channels"
Don't mention "voltage-gated channels" - these respond to voltage, not mechanical pressure!
Don't say the membrane is "weakened" (markscheme says "IGNORE weakened")
Don't say "pores" - use "gaps" or "spaces" instead
Don't say "breaks in the bilayer" - makes it sound permanent and damaged
Don't suggest additional channels are inserted - that's not what happens
Examiner insight: The markscheme reveals this was "frequently poorly understood. The most common correct response was that deformation would open the sodium ion channels. While some candidates appreciated that the bilayer might develop temporary gaps, they did not specify the phospholipid bilayer. Answers that suggested that the voltage gated channels would open, or that the channels, or the plasma membrane, would be damaged or denatured by the pressure exerted upon them did not gain credit."
Model Answer: "If the stimulus is not strong enough/threshold (value) is not reached/depolarisation (of membrane) is insufficient, then it/an action potential is not generated" ✓
OR the reverse: "If threshold is reached/exceeded, an action potential IS generated" ✓
Markscheme guidance - What to write:
State the condition: threshold must be reached/exceeded
State the consequence: action potential either happens or doesn't
ACCEPT "impulses" for "action potentials"
What NOT to write:
Don't refer to the "strength" of an action potential - they're all the same size!
Don't say "the action potential reaches threshold" - it's the STIMULUS/DEPOLARISATION that reaches threshold
Don't give specific numbers (like -55mV) unless the question asks for them
Don't say action potentials vary in size - this contradicts the principle!
Examiner insight: The markscheme notes that "some incorrectly stated that the action potential would have to reach threshold or simply said that the action potential would either happen or it wouldn't. Some referred to the strength of the action potential, thereby negating their answer."
Perfect answer structure: "If [condition about threshold] then [consequence about action potential being generated or not]"
Model Answer earning both marks:
"It is represented by the frequency of the action potentials" ✓
"A high frequency/rate of action potentials shows a strong/intense stimulus" ✓
Markscheme guidance - What to write:
You MUST use the term "frequency" or "frequent" - this is essential!
Link frequency to stimulus strength
ACCEPT "impulses" for "action potentials"
ACCEPT "rate of generation" as well as frequency
What NOT to write:
Don't say "more action potentials" without mentioning TIME/RATE - this only gets 1 mark maximum
Don't say action potentials travel "faster" - they always travel at the same speed in a given neurone
Don't just describe how impulses pass to the brain without addressing the frequency aspect
Critical point from markscheme: "Max 1 mark if term 'frequent' or derived term NOT used in answer"
Examiner insight: "Good answers showed an appreciation that the information about the strength and intensity of a stimulus is communicated to the brain by way of the frequency of the action potentials. Many commented that a greater stimulus strength would lead to a greater number of action potentials but without reference to a time element, or that they would travel faster."
Example of a 2-mark answer: "A higher frequency of impulses represents a strong stimulus" - this gets both marks because it includes frequency AND links it to stimulus strength.
Question 5: Interpreting Action Potential Graphs
Answer: B ✓
How to analyse this systematically:
Let's identify what's happening at each position on the graph:
Position 1 (at -70mV, resting potential):
Na⁺/K⁺ pump: YES - always operating
Na⁺ channels: NO - closed at rest
K⁺ channels: Some open - membrane is permeable to K⁺ at rest
Position 2 (upward slope, depolarisation):
Na⁺/K⁺ pump: YES - still operating (it never stops!)
Na⁺ channels: YES ← This is what causes depolarisation!
K⁺ channels: NO - still closed
Position 3 (peak at +30mV):
Na⁺/K⁺ pump: YES - still operating
Na⁺ channels: Closing - starting to inactivate
K⁺ channels: Opening - starting to open
Position 4 (downward slope, repolarisation):
Na⁺/K⁺ pump: YES - still operating
Na⁺ channels: NO - now closed
K⁺ channels: YES ← This is what causes repolarisation!
Therefore B is correct because at position 2:
✓ Na⁺/K⁺-pump IS operating (yes)
✓ Voltage-gated Na⁺ channels ARE open (yes) - causing depolarisation
✓ Voltage-gated K⁺ channels are NOT open yet (no)
CRITICAL MISCONCEPTION: Many students think the sodium-potassium pump switches on and off during the action potential. IT DOESN'T! It operates continuously, constantly moving 3Na⁺ out and 2K⁺ in, using ATP. This maintains the concentration gradients that allow the action potential to occur.
How to remember what causes what:
Depolarisation (going UP) = Na⁺ channels OPEN (sodium rushes IN)
Repolarisation (going DOWN) = K⁺ channels OPEN (potassium rushes OUT)
Na⁺/K⁺ pump = ALWAYS working in the background
Exam technique: If you see a graph question like this, trace what's happening at each position:
Is it going up? → Na⁺ channels opening
Is it going down? → K⁺ channels opening
Pump always operating? → YES!
Additional High-Yield Question: Multiple Sclerosis and Nervous Transmission
Answer: D ✓
Why D is INCORRECT (and therefore the right answer to this question):
The nodes of Ranvier are NOT electrical insulators - in fact, it's the opposite! The nodes of Ranvier are the gaps between the myelin sheath where the axon membrane is exposed. This is where depolarisation occurs during saltatory conduction.
What DOES act as an electrical insulator? The myelin sheath itself (formed by Schwann cells) acts as the insulator.
Why the other statements are correct:
A is correct: Breakdown of myelin (as in Multiple Sclerosis) does cause uncoordinated movement
B is correct: Saltatory conduction (jumping between nodes) does increase speed
C is correct: Schwann cells do wrap around the axon to form myelin
Top tip for "NOT correct" questions: Read carefully! You're looking for the FALSE statement. Circle or underline "not" in the question to remind yourself.
Question 6: Understanding Unmyelinated Neurones
Model Answers (1 mark maximum):
Answer 1: "No nodes of Ranvier" ✓
Answer 2: "Shorter local currents/circuits" ✓
Answer 3: "Whole axon needs to be depolarised" ✓
(Award 1 mark for any ONE of these points)
Markscheme guidance - What to write:
IGNORE references to "jumping between nodes" - that's already in the question!
ALLOW "more local currents/circuits"
ALLOW "action potentials need to be generated all the way along the axon"
What NOT to write:
Don't just repeat what's in the question (e.g., "because there's no saltatory conduction")
Don't describe what saltatory conduction IS - explain WHY its absence slows transmission
Examiner insight: The markscheme reveals "There were few correct responses for this part of the question which was assessing AO2 with many candidates referring to the impulse not being able to jump from node to node, which is a description of saltatory conduction already stated in the stem of the question. Good responses referred to the need for depolarisation to occur along the whole axon (membrane)."
The key understanding:
WITH myelin: action potential "jumps" between nodes (long distance, fast)
WITHOUT myelin: action potential must depolarise every section (slow, like a Mexican wave along the entire axon)
Top Tips for Exam Success Based on Markscheme Guidance
1. Use precise ion notation:
Write Na⁺ not "Na" - examiners are specific about this!
The markscheme repeatedly states "DO NOT CREDIT Na channels" but "CREDIT Na⁺ channels"
Same for K⁺ - include the charge
2. For transducer questions, ALWAYS specify BOTH energy types:
✓ "Converts mechanical energy into electrical energy"
✗ "Converts energy" (too vague)
✗ "Converts pressure into impulses" (not energy types)
3. Use "frequency" when discussing stimulus intensity:
This term MUST appear to get full marks
"More action potentials" without time reference = only 1 mark
✓ "Higher frequency of action potentials indicates stronger stimulus"
4. Remember: the all-or-nothing law means:
Action potentials are ALL the same size
Never refer to "strength" or "size" of action potentials
Stronger stimulus = more frequent action potentials, not bigger ones
5. Know what NOT to write:
Topic Don't write Do write Ion channels "Na channels" "Na⁺ channels" / "sodium ion channels" Transducers "converts pressure" "converts mechanical energy to electrical energy" Stimulus coding "more action potentials" "higher frequency of action potentials" All-or-nothing "stronger action potentials" "action potentials either occur or don't occur" Membrane changes "membrane breaks" "temporary gaps in phospholipid bilayer"
6. For myelination questions:
Nodes of Ranvier = GAPS in myelin (NOT insulators)
Myelin sheath = the INSULATOR
Saltatory conduction = FASTER (jumping between nodes)
No myelin = SLOWER (whole axon must depolarise)
Understanding Markscheme Comments
The markschemes include "Examiner's Comments" that reveal common mistakes. Here are the most important ones for this topic:
On Pacinian corpuscles as transducers: "Inadequate responses stated that the corpuscle would transform the stimulus into an electrical impulse" - you must talk about ENERGY transformation, not stimulus transformation.
On sodium channel opening: "Answers that suggested that the voltage gated channels would open... did not gain credit" - mechanical pressure opens STRETCH-SENSITIVE channels, not voltage-gated ones.
On the all-or-nothing law: "Some referred to the strength of the action potential, thereby negating their answer" - never talk about action potential strength!
On stimulus intensity: "Many commented that a greater stimulus strength would lead to a greater number of action potentials but without reference to a time element" - you MUST mention frequency/rate.
On saltatory conduction: "Many candidates referring to the impulse not being able to jump from node to node, which is a description of saltatory conduction already stated in the stem of the question" - don't repeat the question; explain the mechanism!
Practice Strategy
To master this topic:
Make flashcards for definitions - especially the precise wording examiners want
Draw and label neurone diagrams - practice until you can identify all three types instantly
Annotate action potential graphs - label each phase with what's happening to which channels
Practice "What NOT to write" - understanding wrong answers helps avoid them!
Use past papers - the markschemes are gold dust for understanding exactly what's required
Remember: examiners want precision, correct terminology, and clear explanations of mechanisms. Use the markscheme guidance to train yourself to write exactly what they're looking for!
Good luck with your revision! 🧠⚡
Remember: This covers section 5.1.3 (a to c) only. Make sure you also revise synaptic transmission (5.1.4) as it follows on directly and is often examined together!
Mastering Microscopy and Cell Structure: Common OCR A Level Biology Questions Answered
Prior Knowledge to Recap
Before diving into microscopy and cell structure, make sure you're confident with these key concepts:
• Basic cell structure – understanding the difference between prokaryotic and eukaryotic cells, and being able to identify major organelles like the nucleus, mitochondria, and chloroplasts
• Units of measurement – being confident with converting between millimetres (mm), micrometres (μm), and nanometres (nm) is essential for magnification calculations (1mm = 1000μm, 1μm = 1000nm)
Mastering Microscopy and Cell Structure: Common OCR A Level Biology Questions Answered
Prior Knowledge to Recap
Before diving into microscopy and cell structure, make sure you're confident with these key concepts:
• Basic cell structure – understanding the difference between prokaryotic and eukaryotic cells, and being able to identify major organelles like the nucleus, mitochondria, and chloroplasts
• Units of measurement – being confident with converting between millimetres (mm), micrometres (μm), and nanometres (nm) is essential for magnification calculations (1mm = 1000μm, 1μm = 1000nm)
• The concept of magnification – knowing that magnification = image size ÷ actual size, and being able to rearrange this formula
• Resolution versus magnification – understanding that magnification makes things appear larger, whilst resolution is the ability to distinguish between two separate points
• Light and lenses – appreciating how light microscopes use glass lenses to magnify specimens, and that electron microscopes use electrons instead of light
Links to GCSE Content
This topic builds directly on your GCSE Biology knowledge:
• Using a light microscope – at GCSE you learned to use a light microscope to observe cells; now you'll learn about different types of microscopes (electron microscopes and laser scanning confocal microscopes) and their specific applications
• Animal and plant cells – GCSE covered basic cell structures visible under a light microscope; A level explores the much higher resolution images from electron microscopes that reveal ultrastructure
• Preparing slides – you may have prepared simple slides at GCSE; A level requires precise techniques for slide preparation, staining methods, and understanding why specific procedures are used
Common Question Types and How to Answer Them
Let me walk you through five frequently asked questions from past OCR papers, showing you exactly what examiners are looking for.
Question 1: Preparing a Blood Smear (Practical Technique)
How to approach this question:
This is testing your practical knowledge of slide preparation – a key skill in microscopy. The examiners want to see that you understand the precise method, not just vague statements.
Model Answer using markscheme points:
"Use pipette to place blood (sample) on slide" ✓
"(Place blood) near one end (of slide)" ✓
"Use (2nd) slide/cover slip to spread/smear blood across slide" ✓
"Slide/cover slip at an angle" ✓
(Award 3 marks maximum from these points)
Markscheme guidance - What to write:
You can answer using an annotated diagram if you prefer
ACCEPT "smear" as equivalent to "spread"
For additional valid point (AVP): ALLOW "allow to (air) dry"
What NOT to write:
Don't describe staining procedures – the question says the smear will be stained later
Don't talk about focussing the microscope – that's outside the scope of this question
Examiner insight from markscheme:
"Most candidates scored at least one mark on this question, usually marking point 1, and many achieved all 3. Marking points 3 and 4 were also frequently given. No credit was given for describing staining or focussing as these were outside the scope of the question."
Key technique points to remember:
The blood smear technique is specific:
Small amount of blood placed near one end of the slide
Second slide held at an angle (typically 30-45°)
Pushed/dragged across the first slide to create a thin smear
This creates a monolayer of cells that can be examined individually
Why this technique matters:
Creates a thin enough layer for light to penetrate
Allows individual cells to be distinguished
Prevents cells from overlapping
Question 2: Comparing Microscope Resolution
Answer: A ✓
Why this is correct:
You need to know the resolution of each microscope type (this is examined frequently!):
Microscope Type Maximum Resolution Light microscope 200 nm (lowest) Laser scanning confocal microscope 200 nm (same as light) Scanning electron microscope (SEM) 3-10 nm Transmission electron microscope (TEM) 0.5 nm (highest)
Therefore the correct order from LOWEST to HIGHEST resolution is:
Light microscope (200 nm) → Scanning electron microscope (3-10 nm) → Transmission electron microscope (0.5 nm)
Common mistakes:
Students often confuse:
Resolution with magnification (they're different things!)
The two types of electron microscope
Laser scanning confocal with electron microscopes
Key distinction:
Scanning Electron Microscope (SEM):
Scans surface of specimens
Produces 3D images
Resolution: 3-10 nm
Transmission Electron Microscope (TEM):
Electron beam passes through thin specimens
Produces 2D images
Highest resolution: 0.5 nm
Can see internal structures (ultrastructure)
Memory aid: "TEM is Top for resolution, SEM is for Surfaces"
Question 3: Completing a Microscope Comparison Table
Correct Answers:
Image appearance 2D / 3D 2D ✓ 2D ✓
Image colour named colour/coloured ✓ black and white ✓ black and white
(Mark each row)
How to work this out:
Row 1: Image appearance
SEM produces 2D images (despite showing surface detail that looks 3D)
TEM produces 2D images (flat sections through specimens)
The markscheme awards 1 mark for this row
Row 2: Image colour
Laser scanning confocal uses fluorescent dyes → coloured images
Both electron microscopes produce black and white images originally
The markscheme awards 1 mark for this row
Important clarifications:
Why does SEM image appearance = 2D?
This confuses many students because SEM images look 3D. However:
The data captured is 2D (a flat image)
The depth perception comes from shading and shadows
Technically it's a 2D representation of a 3D surface
Some markschemes accept "3D" for SEM, but this one specifically wants "2D"
What about confocal image colour?
The markscheme accepts:
Named colour (e.g., "green", "red")
"Coloured" (general term)
Confocal microscopes use fluorescent tags that emit specific colours
Question 4: Identifying Biological Drawing Errors
Part (i): Identify ONE incorrect label and explain your answer. (3 marks)
Model Answer using markscheme:
Incorrect label: ribosome ✓
Explanation:
"Cannot see with this/light microscope" ✓
"(Light microscope) resolution not high enough/too low" ✓
OR
"(Light microscope) magnification not high enough/too low" ✓
"It is a nucleus" ✓
Markscheme guidance - What to write:
ALLOW "not visible/cannot be viewed/detected" for "see"
ALLOW "resolution not sharp/clear/strong/detailed enough"
What NOT to write:
Don't just say "structure shown too large" – need to explain why it can't be seen
Don't say resolution is "strong" or "weak" – use "high" or "low"
Why ribosomes can't be seen with a light microscope:
The limiting factor:
Light microscope resolution = 200 nm
This means two points closer than 200 nm apart cannot be distinguished
Ribosomes (20-30 nm) are much smaller than this limit!
Examiner insight from markscheme:
"any three from:
label lines should not cross ✓
no arrowheads ✓
no shading/colouring in ✓
give magnification/scale ✓
give title ✓
draw cell walls as two lines ✓
draw organelles in proportion ✓
(Award 3 marks maximum)"
Markscheme guidance:
ALLOW "must be parallel" (for label lines)
ALLOW "give diagram a name" (for title)
ALLOW reference to "nuclei/structures labelled as ribosomes, too big"
The rules for biological drawings:
✓ DO:
Use a sharp pencil
Draw continuous, clear lines
Draw label lines with ruler (straight, not crossing)
Draw in proportion to what you see
Include title and magnification
Draw cell walls as double lines (showing thickness)
✗ DON'T:
Use shading, colouring, or sketchy lines
Add arrowheads to label lines
Draw things you can't actually see
Make structures disproportionately large or small
Common marking points students miss:
Many students know about "no shading" and "sharp pencil" but forget:
Magnification must be stated
Title should identify the specimen
Proportion is critical – organelles must be correctly sized relative to the cell
Question 5: Why Cells Need to Be Stained
Model Answer using markscheme:
"Create/provide/increase contrast" ✓
"Make cells/(named) component(s) visible" ✓
OR
"Cells/(named) components can be identified/distinguished/differentiated" ✓
(Award 2 marks for a complete explanation)
Markscheme guidance - What to write:
ACCEPT "(named) organelle(s) stand out from surroundings"
ACCEPT "regions/parts/AW of cell"
What NOT to write:
Don't just say "clearer" – this is too vague (IGNORE according to markscheme)
Examiner insight:
"Most candidates knew that staining made cell components visible and many also understood that the stain increases the contrast."
Why staining is necessary:
The problem with unstained cells:
Most cells and their components are transparent or translucent when viewed under a light microscope because:
Cell structures are mostly made of water, proteins, and lipids
These materials don't absorb much light
Little contrast exists between different structures
The cytoplasm and organelles look similar
What staining achieves:
Increases contrast between different structures
Makes specific components visible that would otherwise be transparent
Allows differentiation between cell types
Enables identification of particular organelles or structures
Different types of staining:
Simple staining:
Uses one dye
All cells/components stained the same colour
Example: Methylene blue stains all cells blue
Differential staining:
Uses multiple dyes
Different components stain different colours
Allows identification of specific structures
Common stains you should know:
How stains work:
Stains are typically charged molecules that bind to oppositely charged components:
Positively charged dyes (e.g., methylene blue) bind to negatively charged DNA/RNA
Negatively charged dyes (e.g., eosin) bind to positively charged cytoplasmic proteins
Additional Question: Improving Slide Preparation
Describe TWO ways in which this procedure could be improved. (2 marks)
Model Answers using markscheme (award 2 marks maximum):
"Place stain at edge of sample (not the centre)" ✓
"Lower cover slip at an angle/use mounted needle" ✓
"Use blotting paper to remove excess stain/pull stain through" ✓
"Use more than one stain (to improve contrast)" ✓
Markscheme guidance - What to write:
Mark as prose (not bullet points required)
IGNORE "use forceps/lay sample flat"
ALLOW "place stain at side of sample"
ALLOW stated angles given e.g., 45°
ALLOW "tissue/paper towel instead of blotting paper"
ALLOW "ensure stain covers whole sample"
What NOT to write:
Don't mention aseptic technique (not relevant here)
Don't talk about adding water
Don't mention wearing gloves
Don't mention pressing down on cover slip to remove air bubbles
Examiner insight:
"Candidates who had a practical knowledge of slide preparation scored well, mentioning lowering the cover slip at an angle or using blotting paper to remove excess stain, as ways to improve the method. However, many candidates wrote about aseptic technique, adding water, wearing gloves, or pressing down on the cover slip to remove air bubbles, which gained no credit."
The correct staining technique:
Step 1: Position the stain correctly
Place stain at the edge of the sample (not in the centre)
This allows stain to diffuse through the sample evenly
Step 2: Lower cover slip at an angle
Hold cover slip at approximately 45°
Touch one edge to the slide first
Slowly lower the opposite edge
This prevents air bubbles from being trapped
Step 3: Draw stain through (optional but better)
Place blotting paper on opposite side of cover slip
The paper draws stain through by capillary action
Removes excess stain
Creates even distribution
Step 4: Remove excess stain
Use blotting paper around edges
Prevents background staining
Creates clearer image
Why each step matters:
Top Tips for Exam Success Based on Markscheme Guidance
1. Practical technique questions need SPECIFIC detail:
✓ "Place blood near one end of slide"
✗ "Put blood on slide" (too vague)
2. Know your microscope specifications:
3. For biological drawing questions:
Remember the 7 key rules:
Sharp pencil, clear continuous lines
No shading or colouring
Label lines straight (with ruler), no arrowheads
Draw in correct proportions
Include title (identifying specimen)
Include magnification/scale
Only draw what you can actually see
4. Understand the difference between:
Resolution = The ability to distinguish between two separate points
This is fixed for each microscope type
Cannot be adjusted by the user
Determined by the wavelength of light/electrons used
Magnification = How much larger the image appears compared to actual size
Can be changed by using different objective lenses
Formula: Magnification = Image size ÷ Actual size
Not the same as resolution!
5. Staining questions - key points:
When asked "Why stain cells?":
Always mention "increase/provide contrast"
State that it makes cells/specific components visible
Can mention identification/differentiation of structures
When asked about staining method:
Stain at edge not centre
Cover slip at an angle
Use blotting paper for excess
May use multiple stains for differential staining
6. Common mistakes to avoid:
Common Error Why it's wrong Correct answer "Staining makes cells clearer" Too vague "Staining increases contrast between structures" "High magnification gives better resolution" Magnification ≠ resolution "Electron microscopes have higher resolution than light microscopes" "Ribosomes can be seen with light microscope" Too small (20-30 nm) "Ribosomes cannot be seen - below 200 nm resolution limit" "SEM images are 3D" Technically 2D data "SEM produces 2D images of surfaces" (though may appear 3D)
Understanding Examiner's Comments from Markschemes
The markschemes include valuable "Examiner's Comments" that reveal common mistakes. Here are the most important ones for this topic:
On blood smear preparation (Q1): "No credit was given for describing staining or focussing as these were outside the scope of the question."
Lesson: Read the question carefully - only describe what's asked for!
On pond water slide preparation (Q2a): "Many answers discussed improving the method in terms of not pouring the pondwater on the slide but suggested a smear approach, not appreciating that a smear would effectively be a dried sample that would not be appropriate to observe the contents of pond water."
Lesson: Different specimens need different preparation methods!
Misconception highlighted: "Many candidates believe that dyes are required to see anything using a light microscope. Dyes are required to distinguish cell types and subcellular structures. Organisms can be seen under a light microscope without the need for a colour contrast."
Lesson: Staining improves visibility and increases contrast, but isn't always essential to see something
On biological drawings (Q9): "Some answers discussed the label lines and lack of arrow heads as a piece of evidence without appreciating the question refers to both figures to support the student's statement and not just a list of rules for a good biological drawing."
Lesson: Always relate your answer to what the question is specifically asking
On staining procedures (Q10iv): "Candidates who had a practical knowledge of slide preparation scored well... However, many candidates wrote about aseptic technique, adding water, wearing gloves, or pressing down on the cover slip to remove air bubbles, which gained no credit."
Lesson: Practical experience is invaluable! But always focus on what's relevant to the question
Practice Strategy
To master this topic effectively:
1. Get hands-on practical experience
Actually prepare slides yourself - blood smears, pond water, onion cells
Practice using a light microscope with different objective lenses
Try different staining techniques
2. Make comparison charts Create a detailed table comparing all microscope types - this is tested repeatedly
3. Practice biological drawings
Draw from real microscope images (not from textbooks)
Follow all 7 rules strictly
Get feedback from your teacher
4. Learn the specifications exactly
Memorise the resolution values for each microscope type
Know which produces 2D vs 3D images
Understand colour vs black and white images
5. Use the markschemes
Read the "What NOT to write" sections carefully
Understand why certain answers don't get credit
Learn from the Examiner's Comments
6. Link practical to theory When you do a practical, ask yourself:
Why am I using this technique?
What would happen if I changed this step?
How does this relate to the microscope's limitations?
Quick Reference Guide
Resolution (lowest to highest): Light (200 nm) → SEM (3-10 nm) → TEM (0.5 nm)
Magnification (lowest to highest): Light (×1500) → SEM (×100,000) → TEM (×500,000)
Image appearance:
Light/Confocal: 2D or 3D
SEM: 2D (of surfaces)
TEM: 2D (of sections)
Image colour:
Light: Natural or with stains
Confocal: Fluorescent colours
SEM & TEM: Black and white
Can use with living specimens:
Light: YES
Confocal: YES
SEM: NO (vacuum, coated)
TEM: NO (ultra-thin sections)
The 7 rules of biological drawing:
Sharp pencil, clear lines
No shading/colouring
Straight label lines, no arrows
Correct proportions
Title included
Magnification stated
Draw only what's visible
Why cells are stained:
Increase/provide contrast
Make cells/components visible
Enable identification/differentiation
Remember: examiners reward precision, practical knowledge, and correct terminology. The difference between a good answer and a great answer often lies in the specific details you include!
Good luck with your revision! 🔬🧫